
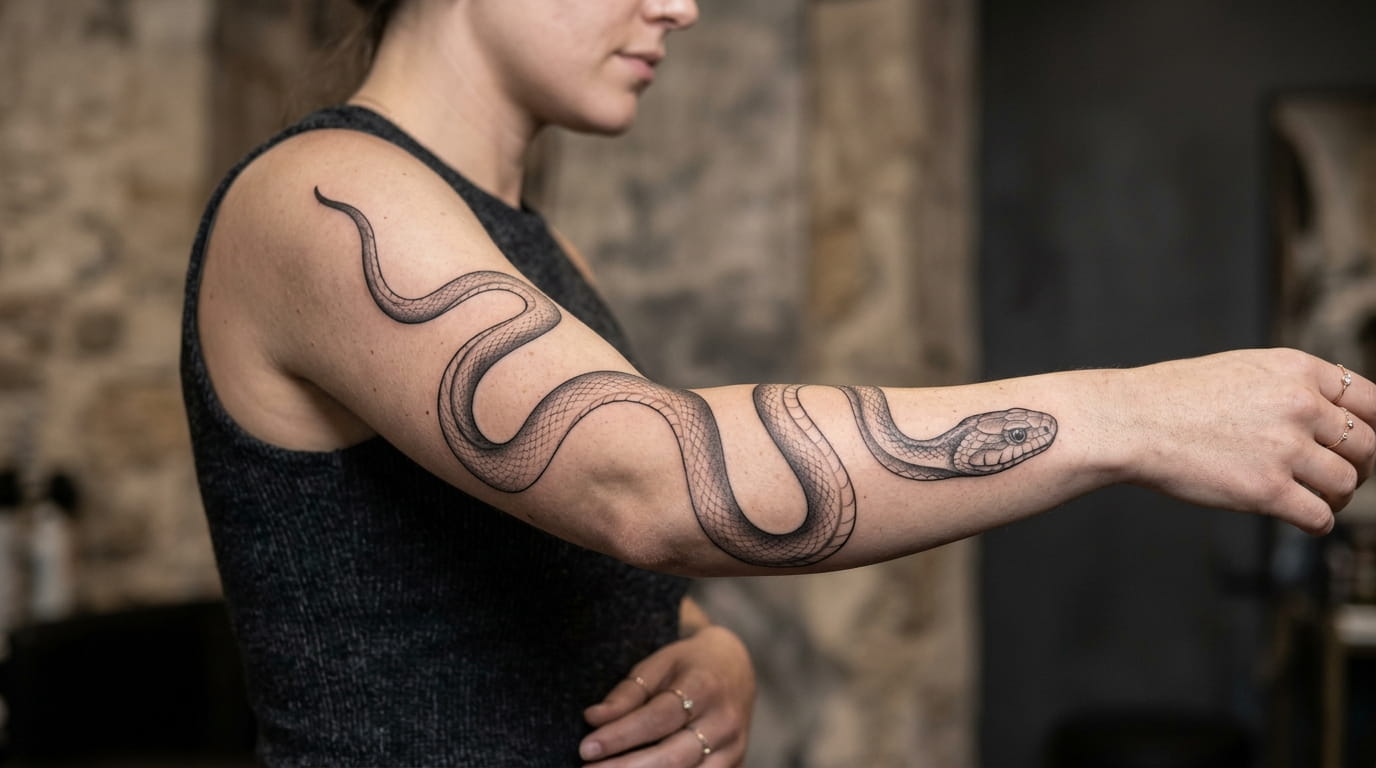
On paper, the snake looks perfect. Smooth curves, a sharp head, a tail that tapers just right. Then the stencil goes on your arm, and the coils bunch up at the elbow while the head disappears around the back.
That gap between the drawing and the limb is the whole reason snake tattoo placement deserves a real plan. A snake is a long shape, and a limb is a curved one that moves. They have to be matched on purpose.
The good news is that planning is simple once you break it into steps. The twelve steps below run from choosing the limb to the final check before you book. Along the way you will see how to measure the space, map the path, and decide where the head should rest.
Each step has a quick visual you can save or screenshot. Work through them in order, and you will arrive at the consult with a plan, not just a picture.
1. Choose Your Limb: Forearm, Upper Arm, Calf, or Thigh

Start with the limb, because it decides everything else. A snake needs length to move, and each part of the arm or leg gives you a different amount.
The forearm is narrow and easy to see, so it suits a slim snake with two or three wraps. The upper arm is wider and hides more of the design. The calf has a natural curve that a snake can follow. The thigh is the roomiest, and it can hold a long, thick body.
Think about your daily life too. A forearm snake shows constantly. A thigh snake shows when you choose.
2. Measure the Space With a Piece of String First
A piece of kitchen string is the cheapest design tool you will ever use. Snake designs are shown as pictures, but you wear them by the inch, and the string shows you the difference.
Lay it along your limb where the snake would travel, curving it the way the body would curve. Mark where it starts and ends with a pen. Then measure that length against a ruler.
That number is the real length of your snake. It also tells you how thick the body can be before it looks crowded.
Hold one end of the string at the spot where the tail will start.
Follow the path you want, curving at every bend, and mark where the head will rest.
Lay the string flat against a ruler and note the length.
3. Map the Snake’s Path With a Simple Flow Diagram
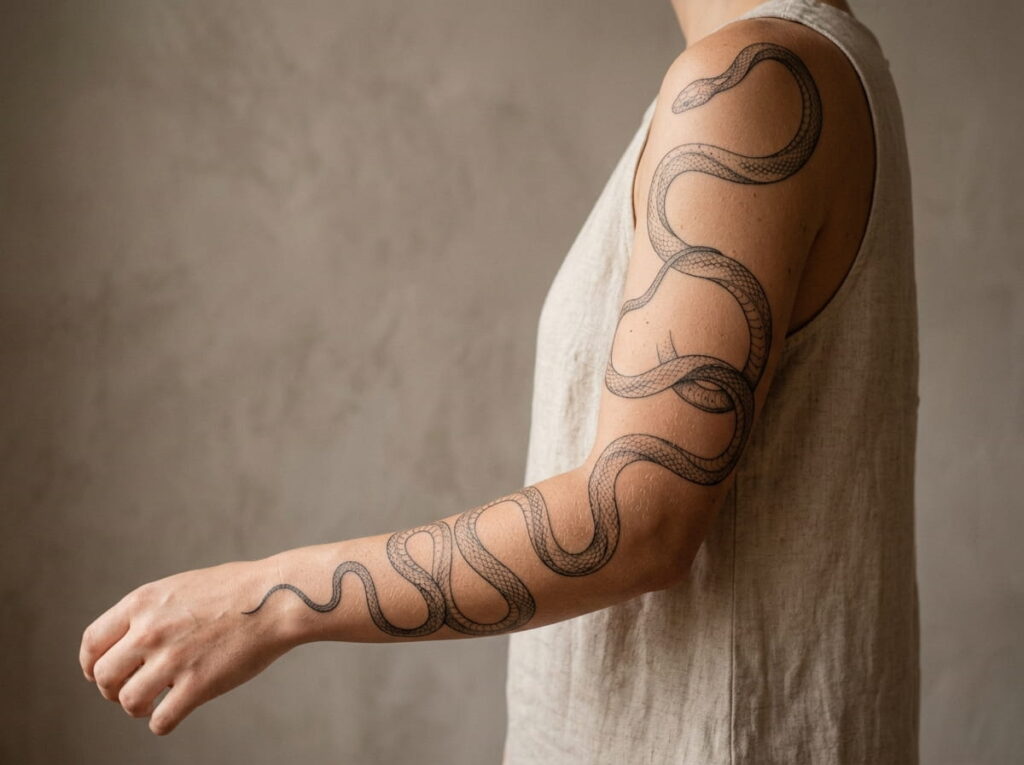
A path on paper stops the snake from wandering. Before anyone draws a single scale, decide the route the body will take, from the tail to the head.
Think of it as a short list of stops. Where does the tail start? Which way does the first curve go? Where does the body cross the limb? Where does the head end up? Each answer is a point on the map, and your artist can build the design around them.
Here is a sample path for an arm. Swap the stops for your own limb.
4. Decide Where the Head Will Rest, Because It Draws the Eye
People look at the head first, then follow the body back. That makes the head the most important spot in the whole design.
Place it where it can be seen without twisting. On the forearm, the outer side facing the world works well. On the calf, the outer side is where the eye lands when you walk past a mirror.
The head also sets the mood. Facing forward feels watchful. Turned along the limb feels calm and moving.
💡 Quick Tip
Stand in front of a mirror and relax your arm or leg the way you normally hold it. The spot your eye lands on first is where the head wants to sit.
5. Count the Coils: How Many Wraps Fit Before It Feels Crowded
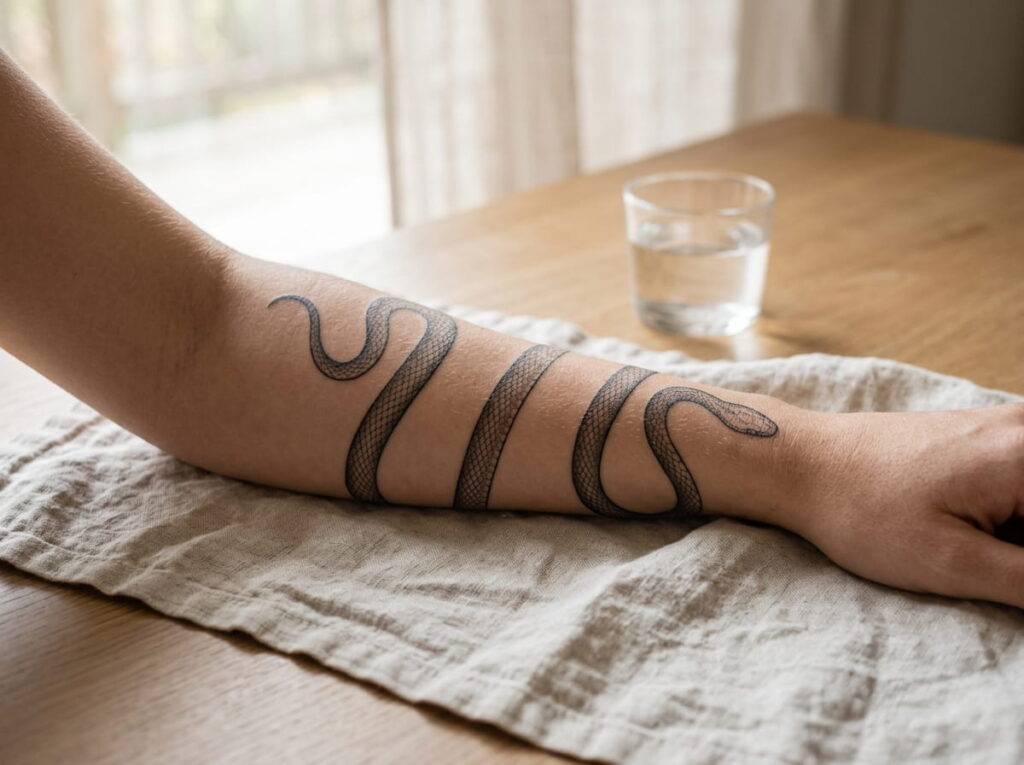
More coils do not always mean a better snake. Each extra wrap squeezes the body thinner, and thin bodies lose their scale detail first.
Give each wrap room to show its pattern. On a forearm, two or three wraps are often plenty. On a thigh, four or five can work. The space between coils should be at least as wide as the body itself, so skin shows between them.
If you are unsure, start with fewer coils. Extra ones are easy to add later, and removing them is much harder.
Leave bare skin between each coil.
Match the wrap count to the length of the limb.
Keep the body thick where the pattern is detailed.
Squeezing in extra wraps to fill the space.
Letting the coils touch each other.
Thinning the body until the scales blur.
6. Pick a Style That Suits the Length: Fine Line or Blackwork
Fine line and blackwork can describe the same snake and give you two very different tattoos. Fine line shows every scale as a thin, delicate mark. Blackwork fills the body with solid ink and lets the shape do the talking.
Length matters here. A long snake in fine line needs a lot of tiny, careful work, and the thin lines can soften over the years. Blackwork is bolder from a distance and tends to age more gently.
Hold your arm out at a normal distance and picture each version. If you want the detail to show up close, go fine line. If you want it to read from across a room, go blackwork.
| Fine line | Blackwork |
|---|---|
| Delicate scale detail | Bold, graphic shape |
| Best seen up close | Reads from far away |
| Thin lines may soften over time | Solid areas tend to hold well |
| Suits flat, smooth areas | Works on curved areas too |
7. Plan for Movement: Why a Flat Drawing Changes on a Bent Arm

A snake drawn flat on paper does not know that your arm bends. Once the limb twists, stretches, or turns, the coils can look squeezed on one side and stretched on the other.
Ask your artist to place the stencil while your arm or leg is in a relaxed, natural position. Then have them check it with the limb straight, bent, and turned.
The fix is usually small. Shift a coil a little to the side, or widen one wrap, and the snake looks right from the angles you use most.
A snake drawn flat on paper, with even coils and even spacing.
The same snake on the arm, with coils shifted to follow the muscle and the bend of the elbow.
8. Bring These Things to Your Consult
Pack a small folder before the consult, and the conversation gets much easier. Artists do their best work when they know exactly what you picture.
Bring photos of snakes you like, but also of the things you do not. A thick body, a pointed head, scales that look too busy. Knowing the no’s helps as much as knowing the yes’s.
Write down your string measurement too. One number on a sticky note saves a lot of guessing. Here is what to bring:
Consult folder
9. Test the Stencil Before Any Ink Goes In
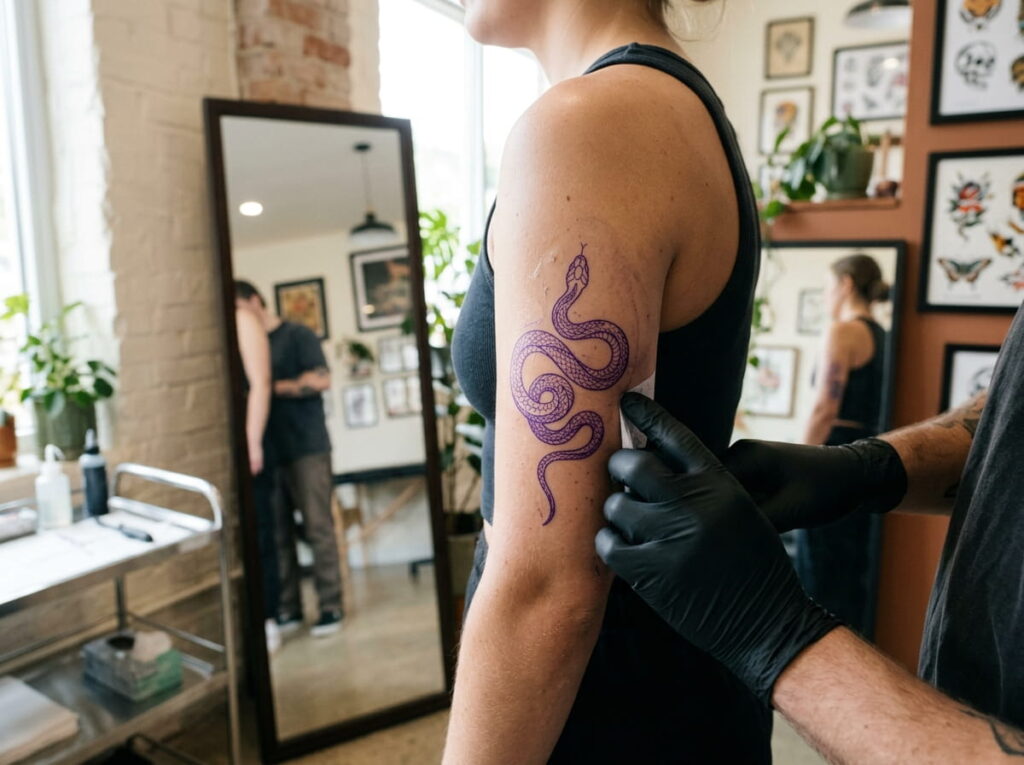
Never skip the stencil test. The stencil is a temporary copy of the design, pressed onto your skin before any ink is used, and it is the best way to see the snake on your actual limb.
Look at it in a mirror from the front, the side, and the back. Move around. Bend the limb. Walk a few steps. If a coil looks off or the head sits oddly, this is the moment to say so.
Take a photo from each angle. Looking at them later, away from the chair, often shows things you missed.
Do not be shy about asking for the stencil to be moved. A shift of a finger width now is far easier than any change after the tattoo is done.
10. Work Around the Elbow, Knee, and Wrist Creases
The most common planning mistake is running a snake straight across a joint. Elbows, knees, and wrists fold all day, and that creasing can pinch the design and make the lines look broken.
Let the body curve around the joint instead of crossing it. A coil that passes at the side of the elbow, or a tail that ends just before the wrist, keeps the scales clear.
Joints are also more sensitive for many people, so a design that gives them a wide berth can make the sitting easier too.
⚠️ Watch Out
Skin over a joint stretches and folds. Ask your artist how the lines will look when the elbow or knee is fully bent, and move the design if they look squeezed.
11. Plan the Sessions: A Long Snake Takes Time
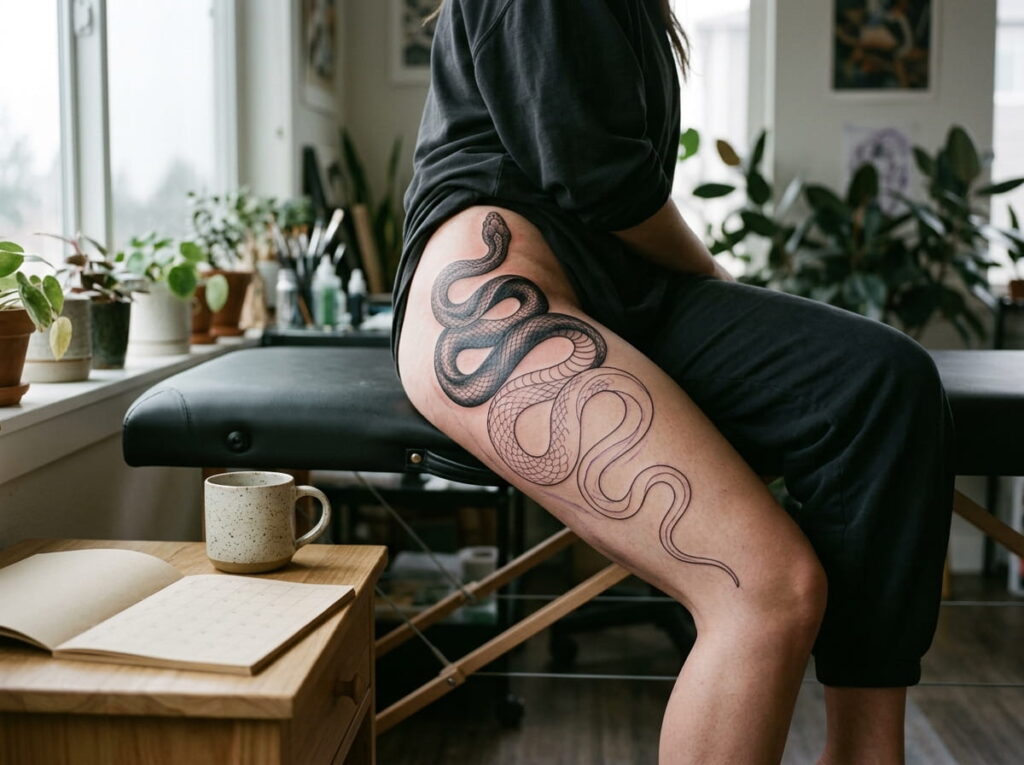
A single snake can take one sitting or four, and the difference comes down to length and detail. Long bodies, tiny scales, and big coils all add hours.
Ask your artist for an honest estimate, and ask how they would split the work. Many artists do the outline first, then add scales and shading in later visits, so the skin has time to heal in between.
What changes the number of sittings:
- The total length of the body
- How detailed the scales are
- How much shading or fill the design has
A wrap that goes all the way around a limb can need extra visits to line up.
12. Run This Final Check Before You Book
Ask five questions, then decide. Say each answer out loud, and if one of them gets a hesitant reply, go back to that step.
A plan that survives all five is a plan worth putting on your skin. Take your time. A snake tattoo is long, and you will see it for years.
Your last five questions:
- ▸Path: does the route make sense on my limb?
- ▸Head: will it sit where I can actually see it?
- ▸Coils: is there bare skin between every wrap?
- ▸Joints: does the design stay clear of the creases?
- ▸Stencil: did I check it from every angle?
Let the Limb Lead the Design
A snake tattoo looks its best when the design follows the shape of the body underneath it. That is what good snake tattoo placement comes down to. Measure the space, map the path, give every coil room, and keep the head where you can see it.
You do not need to figure it all out at once. Start with the limb and a piece of string, then let the rest follow one step at a time. When you are ready, bring your notes and photos to an artist who can turn the plan into ink.
Save this list for the next time you want to plan a wrap tattoo.







Leave a Reply