
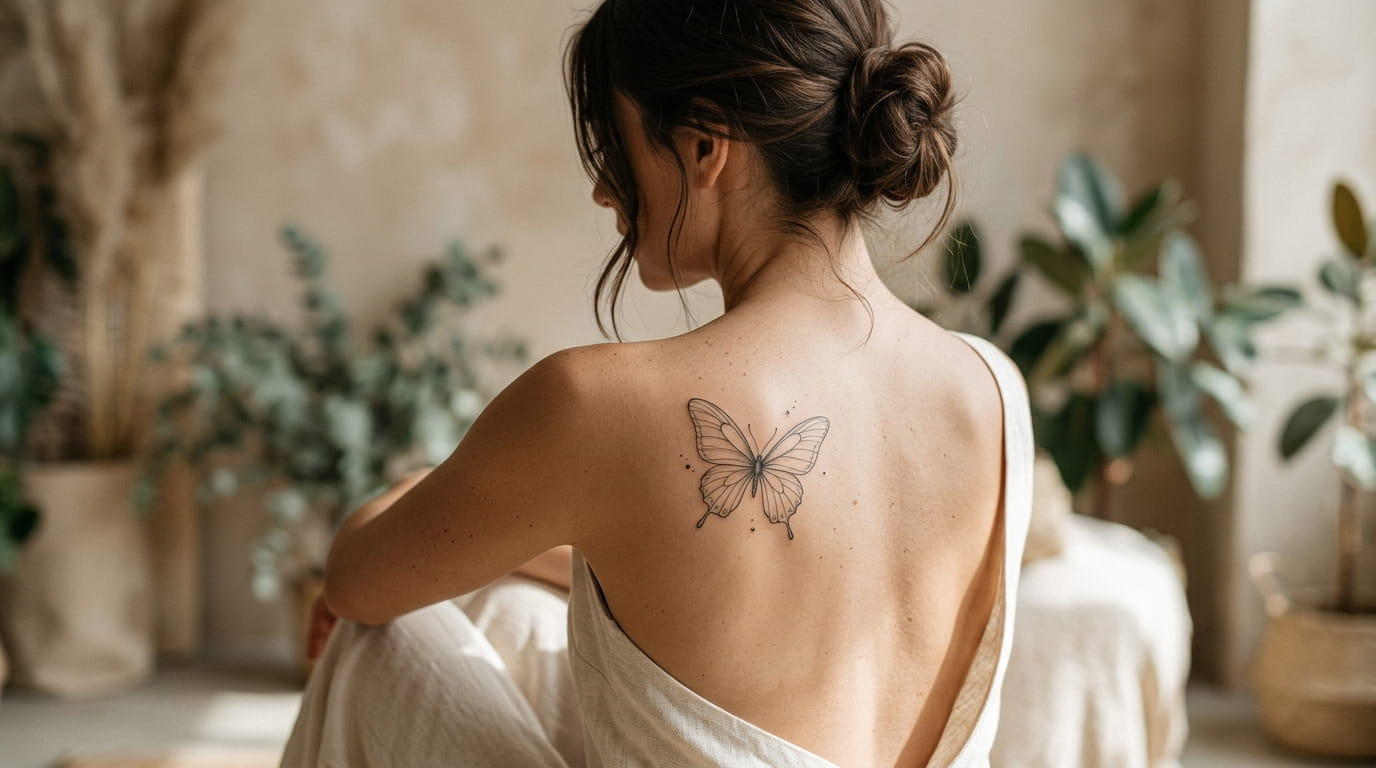
Most butterfly tattoo regrets are not about the butterfly. They are about where it landed. A wing that looked airy on your phone gets crowded on a bony ankle, or softens over a spot that bends and rubs all day.
Fine line work is the least forgiving style when it comes to placement. The lines are thin, the details are tiny, and skin that stretches or moves will show it sooner than a bold design would.
That is why choosing the spot matters as much as choosing the wings. Some places give a small butterfly room to breathe. Others suit a longer, trailing shape, and a few can hold a bigger piece with floating details.
Below are 16 spots, each matched to a style of butterfly so the design and the skin work together. If you have been saving fine line butterfly tattoo designs and still cannot decide where one belongs, start here and let the placement narrow the choices for you.
1. A Tiny Butterfly on the Inner Wrist Where a Bracelet Would Sit
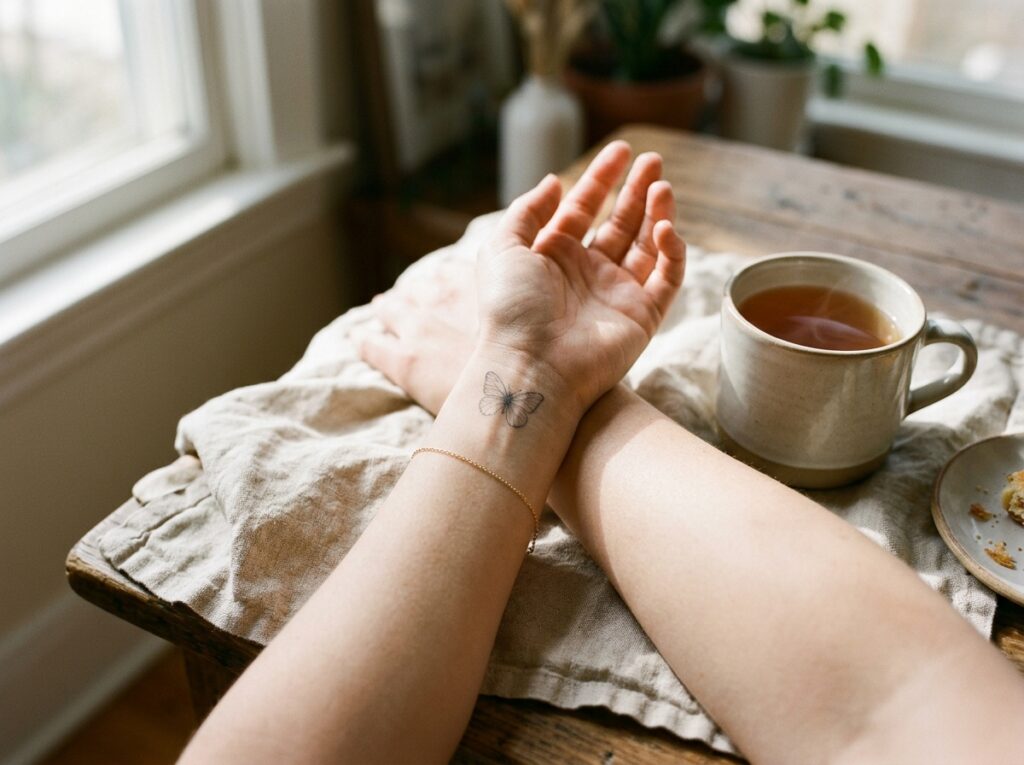
Look at the thin strip just above your palm, where a watch band or bracelet naturally rests.
A butterfly about the size of a thumbnail fits here without crowding. Keep the wings open and even, because the wrist turns constantly and a lopsided shape can look crooked from certain angles.
What works best here:
- Two clean wing outlines with a slim body
- One or two tiny dots as a flight path
- A little empty skin around the whole shape
Skip heavy shading. Thin skin that flexes all day holds simple linework better.
2. Wings Tucked Behind the Ear That Peek Out of Loose Hair
Small rule: if you cannot picture the butterfly working at the size of a fingertip, pick another spot.
The curve behind the ear is narrow, so a single butterfly with a simple body works better than a detailed pair. Your hair does half the styling here. Worn down, it hides the wings. Tucked back, the whole shape shows.
Good pairings for this spot:
- One butterfly with open wings
- A butterfly caught mid turn, with one wing tilted toward the ear
- A tiny butterfly with a short dotted trail
💡 Quick Tip
Ask your artist to mark the spot while you wear your usual hairstyle. Check it in the mirror with your hair up, down and tucked behind the ear before any ink goes in.
3. Fine Line Butterfly Tattoo Designs That Follow the Collarbone
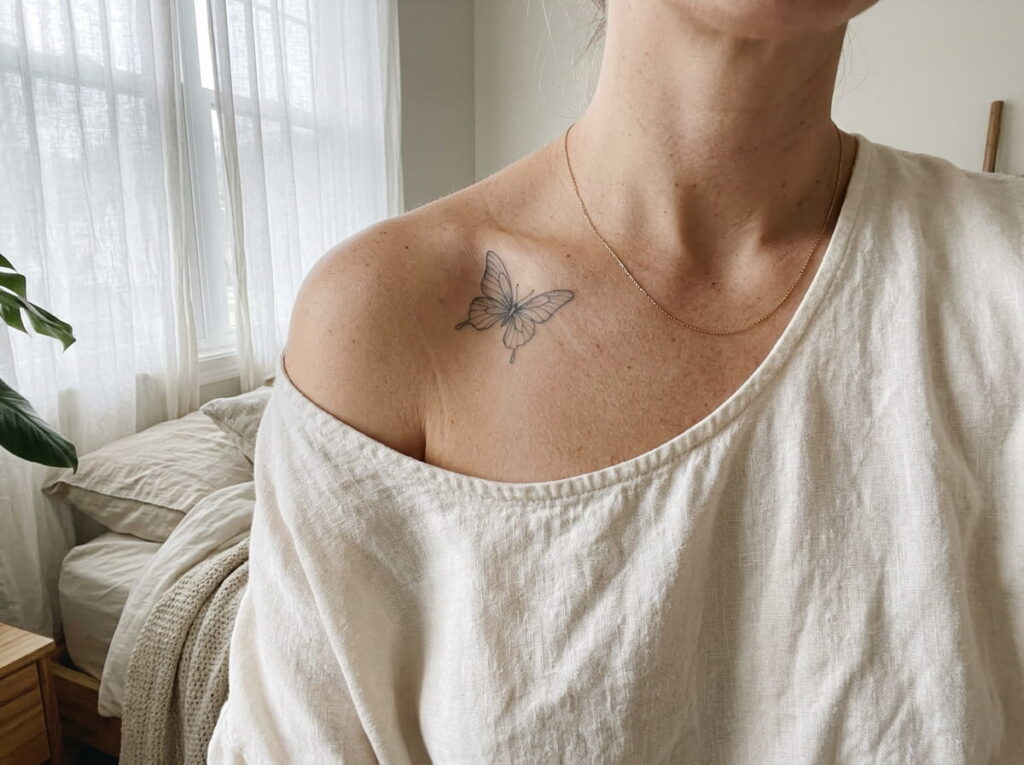
The collarbone gives you two options. The butterfly can sit centered with level wings, like a small brooch. Or it can tilt along the bone, so it looks like it just landed.
- Centered suits symmetry lovers and anyone who wears scoop or V necklines.
- Angled suits a softer, slightly off center look with more movement.
Fine line wings fit this spot well because the skin is fairly flat and the bone works as a built in guide. Ask for the design to sit a little below the bone, since bag straps and bra straps rub right along it.
4. A Small Butterfly Above the Ankle Bone
The most common ankle mistake is putting the butterfly right on the bony bump.
Skin over the ankle bone has very little padding and rubs against shoes and socks, which is hard on thin lines. Moving the design a bit above or below the bone, or onto the softer side of the ankle, gives the wings room to stay clean.
A short dotted trail running back toward the heel also looks good when someone walks ahead of you.
Check these before you book
5. A Butterfly Resting on the Shoulder Blade
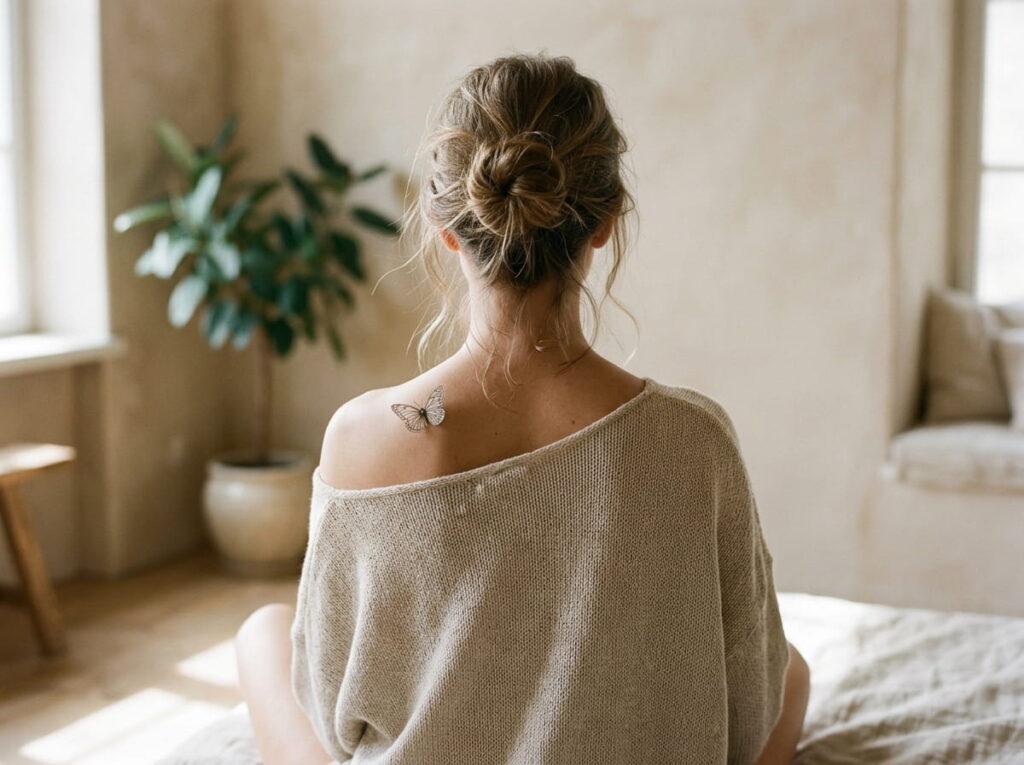
The shoulder blade is a flat, wide area, which is exactly what delicate wings need.
It moves less than a wrist or an ankle, so thin lines have a better chance of staying crisp. You can go a little more detailed here, with veined wings, a tiny body and a few scattered dots as if the butterfly is still settling. It also stays easy to show or cover, depending on the top you wear.
One small warning: if you lift your arms a lot at work, ask for the stencil to be checked with your arm slightly raised.
The butterfly sits high and close to the strap line, so tank tops and bra straps cut across the wings.
Moved a little lower and toward the center of the blade, the full wings clear the straps and stay visible.
6. A Trail of Three Butterflies Down the Spine
Three butterflies, not one, is what makes a spine tattoo feel like movement.
The spine gives you a long, straight guide, so a trail reads naturally from top to bottom. Make the top butterfly the largest and let each one shrink a little as it moves down. Then offset them slightly left and right of the line instead of stacking them dead center. That small zigzag is what makes them look mid flight rather than stamped.
Many people find this spot more sensitive than a flat area like the shoulder blade, so a shorter session can help.
Ask for the gap between butterflies to be at least one wing wide, so the lines never touch.
Stand straight and have someone mark the top and bottom points of the trail along your spine.
Pick three sizes, large at the top and smaller toward the bottom.
Shift each butterfly a little off the center line and tilt the wings in different directions.
7. Side Rib Wings That Follow the Curve of Your Waist
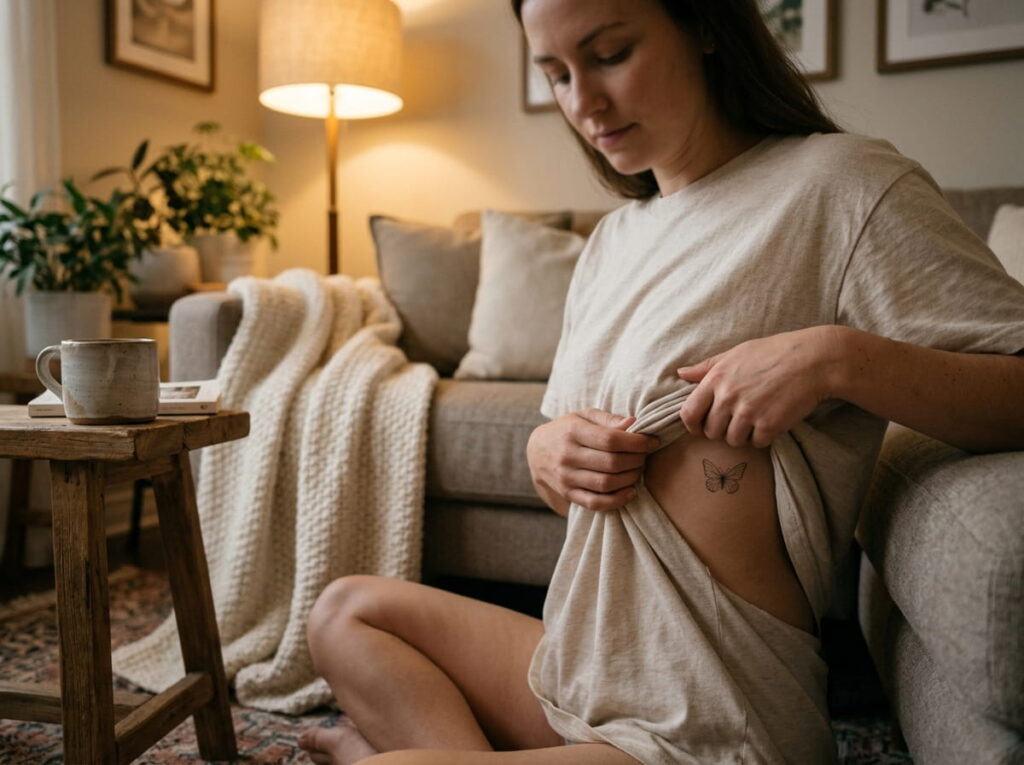
The usual rib mistake is drawing the wings too wide.
Ribs curve in two directions at once, so a wide butterfly can look stretched or lopsided from the front. Keep the wingspan narrow and angle the shape so the top wing follows the line of the ribs and the lower wing points toward the waist.
Skin here moves with every breath and can shift as your weight changes over the years. Delicate linework with some open space around it tends to age more gracefully than tight detail.
Ribs are one of the more sensitive spots for many people, and waistbands and bra bands rub the area while it heals. Wear something loose for the first week.
Keep wings narrow and tilted with the ribs.
Leave a gap between the design and your bra line.
Check the stencil sitting, standing and with your arm raised.
Wide wings that wrap toward the front.
Dense detail packed into a small space.
Tight waistbands during the first days of healing.
8. A Butterfly With a Trailing Vine on the Inner Forearm
Inside of the forearm or outside? The two sides behave differently.
The inner side has softer skin and gets less sun, which is kinder to thin lines. The outer side shows more in daily life but catches more light and wear. A butterfly with a slim trailing vine suits either, because the vine can follow the length of the arm and give the wings a path to travel.
Place the butterfly in the upper third of the vine so the eye lands on the wings first, then follows the stem down toward the wrist.
It suits anyone who wants a design that reads from across the room without taking up much width.
| Inner forearm | Outer forearm |
|---|---|
| Softer skin, easy to hide with a sleeve | Shows every time you reach or wave |
| Less sun exposure day to day | More sun exposure, so sunscreen matters |
| Best with a vine that runs toward the wrist | Best with a longer vine and a slightly larger butterfly |
9. A Butterfly at the Nape of the Neck for Updos
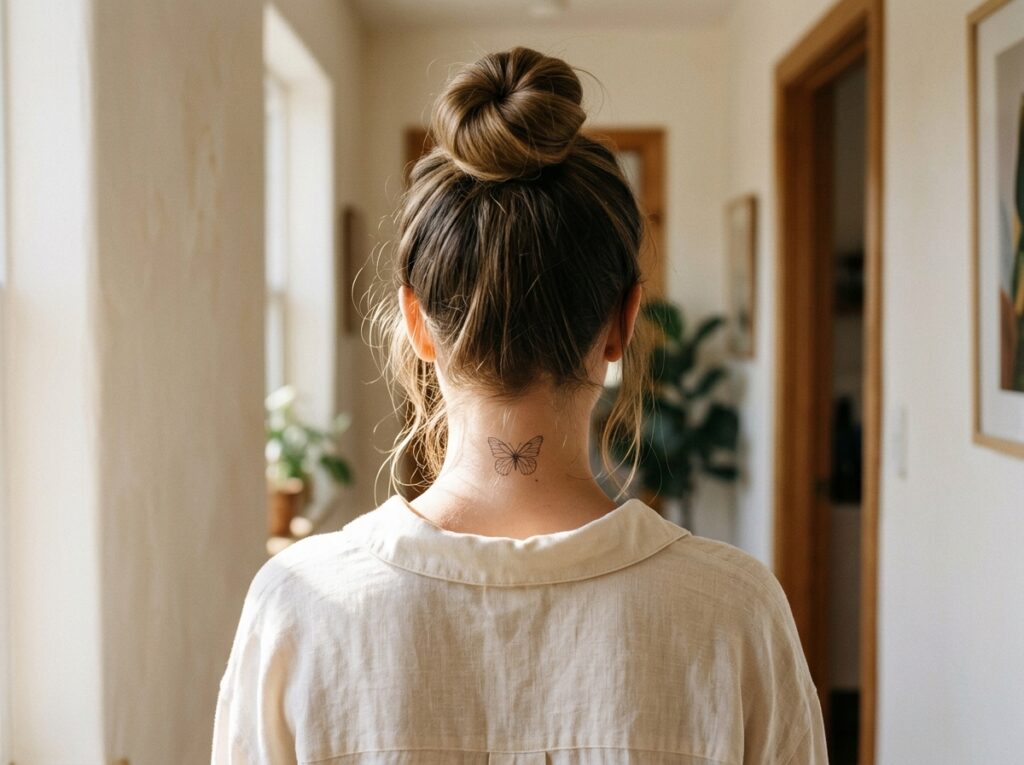
Anyone who wears a high bun already knows the nape is the one spot that shows on schedule.
The center of the nape sits just below the hairline, so a small butterfly with level wings looks tidy and balanced. Keep the width within the natural dip of the neck and leave a little skin between the design and the hairline so the lines are not lost in stray hairs.
Fine, wispy hairs along the hairline can blur very delicate detail. Ask your artist whether the outlines should be a touch stronger here than on your arm.
Hair down, hidden. Hair up, seen.
If your hair covers the butterfly when you want and shows it when you pull your hair up, the spot is doing its job.
10. A Hip Bone Butterfly That Stays Private Until You Want It Seen
A hip butterfly shows up in swimsuits and crop tops, and nowhere else.
That makes it a quiet pick for anyone who likes a private tattoo with an occasional reveal. The slope of the hip bone suits a butterfly tilted along the angle, with a tiny trail curving toward the waist.
High waisted bottoms hide it completely, while a cropped top lets the trail show.
A few things to weigh before you book:
- ▸Belts and waistbands rub right here, so plan loose clothing while it heals.
- ▸Skin can shift with weight changes over the years, so leave extra space around the wings.
- ▸Keep the wingspan within the slope of the bone so the shape does not fold at the crease.
- ▸Stand and sit with the stencil on before you decide on the final angle.
11. A Larger Butterfly on the Outer Thigh With Floating Details
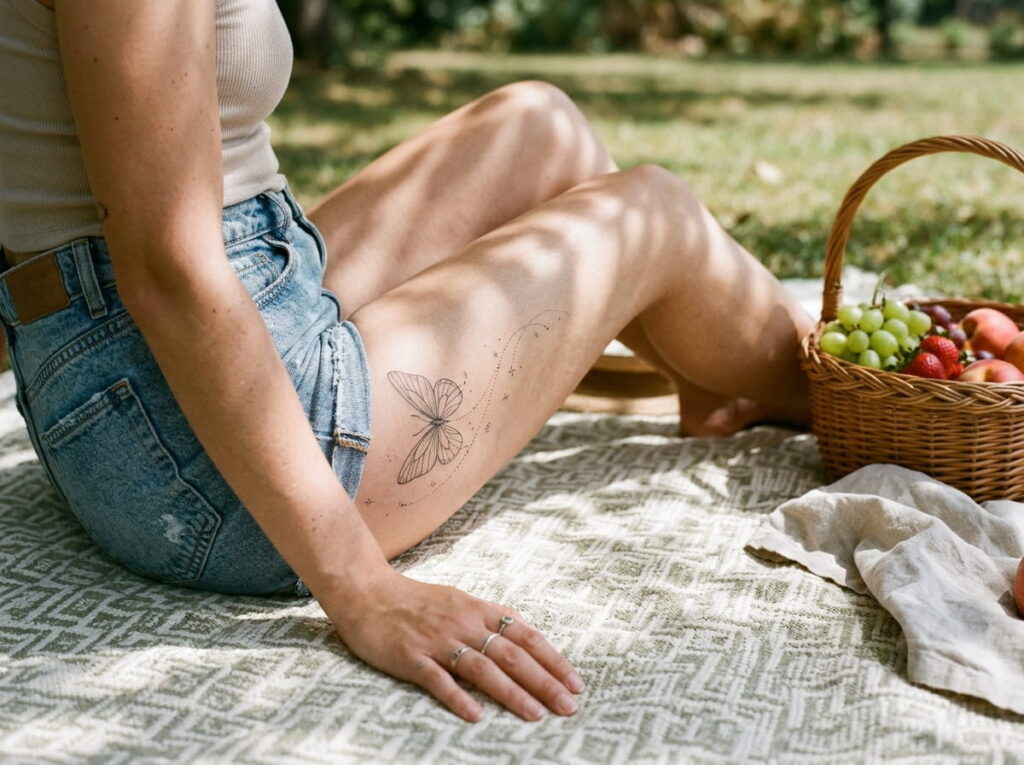
Here is the spot for the butterfly that needs room.
The outer thigh is a wide, smooth stretch of skin, so a bigger design can keep its fine lines without crowding. You can add veining in the wings, a few small dots drifting off one side, or a thin curl that suggests flight.
Because there is so much space, the risk flips. Too many extras and the butterfly gets lost, so pick one supporting detail and let it breathe.
- A single curved trail works best
- Keep the empty skin around it, not just inside it
- Angle the body slightly, not straight up and down
12. A Mini Butterfly on the Side of a Finger
A finger is a small canvas that works harder than any other spot on this list.
Your hands get washed, rubbed and sun exposed all day, and the skin there is thin and active. A tiny butterfly with very simple wings can look sweet on the side of a finger, between the knuckles or near the base. Just go in knowing that this is the placement where thin lines are most likely to soften.
Pick the plainest shape you love here. Two wing outlines and a body is plenty.
⚠️ Watch Out
Fine lines on fingers tend to blur or fade faster than on other areas, and touch ups are common. Ask your artist honestly whether they work on hands and how they keep tiny linework sharp there.
13. Wings Wrapped Around the Curve of the Upper Arm

Hold your arm out and look at how the muscle rounds.
That curve is the whole idea. A butterfly placed on the front of the upper arm looks flat from the side, but if the wings are drawn to follow the roundness, the shape seems to turn with your arm. Keep the body on the front and let one wing sweep toward the back.
Sleeves and sleeveless tops treat this spot well. It stays easy to hide under a short sleeve and easy to show when you want to.
Ask your artist to draw it on while you relax your arm, then flex it, so you can see how the lines shift.
14. A Sternum Butterfly With Wings Opening From the Center
Wings that open from the center of the chest look balanced because the body already is.
The breastbone is a natural middle line, so a symmetrical butterfly sits here without effort. Keep the wings narrower than your instinct says, since the skin over the sternum is thin and the area sits close to necklines and bra bands.
This is one of the more sensitive spots for many people, so a smaller design can make the session easier to handle. Healing is easier in loose, soft tops that do not press on the area.
Ask your artist before you book
15. A Mid Back Butterfly Scaled Up for a Statement Piece
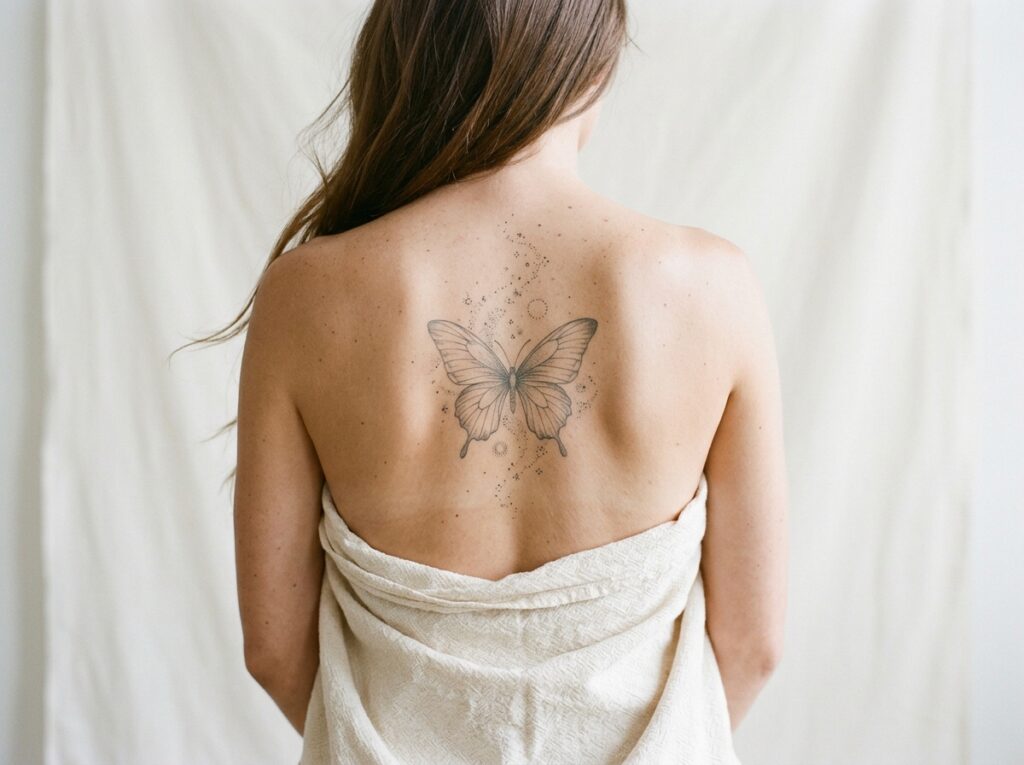
Small butterflies float on a back like a coin on a table. Scaled up, they take over the space.
Between the shoulder blades and down toward the middle of the back, there is enough flat, steady skin to hold a large piece. This is where fine line butterfly tattoo designs can show their full detail, with veined wings, tiny dots along the edges and thin, curved antennae.
Scale does not mean heavy. Keep the line weight thin and add interest with more shapes and more space, not darker ink.
A palm sized butterfly sits alone in the middle of a wide back, with a lot of empty skin around it.
The same design scaled up to fill the space between the shoulder blades, with thin veining and a few drifting dots.
16. Test Any Spot With a Stencil Before You Commit
Every spot above looks good on paper. Your own skin is the only real test.
Paper does not bend, sweat or get caught on a bra strap. Skin does all three. A stencil or skin safe pen outline lets you see how the butterfly sits when you walk, sit, reach and get dressed, which is when a bad angle or a crowded edge becomes obvious.
Give the outline at least a full day if your artist and your schedule allow. Take photos from the front, the side and a mirror angle. If you keep noticing it for the right reasons, it belongs there. If you keep nudging it in your head, move it before any ink goes in.
Bring your butterfly design printed at the size you want, so the outline matches the real thing.
Ask your artist to place the stencil or draw the outline, then check it standing, sitting and with the area moving.
Wear the outline through a normal day, in the clothes and shoes you usually put on.
Take photos from three angles and look at them the next morning before you decide.







Leave a Reply