
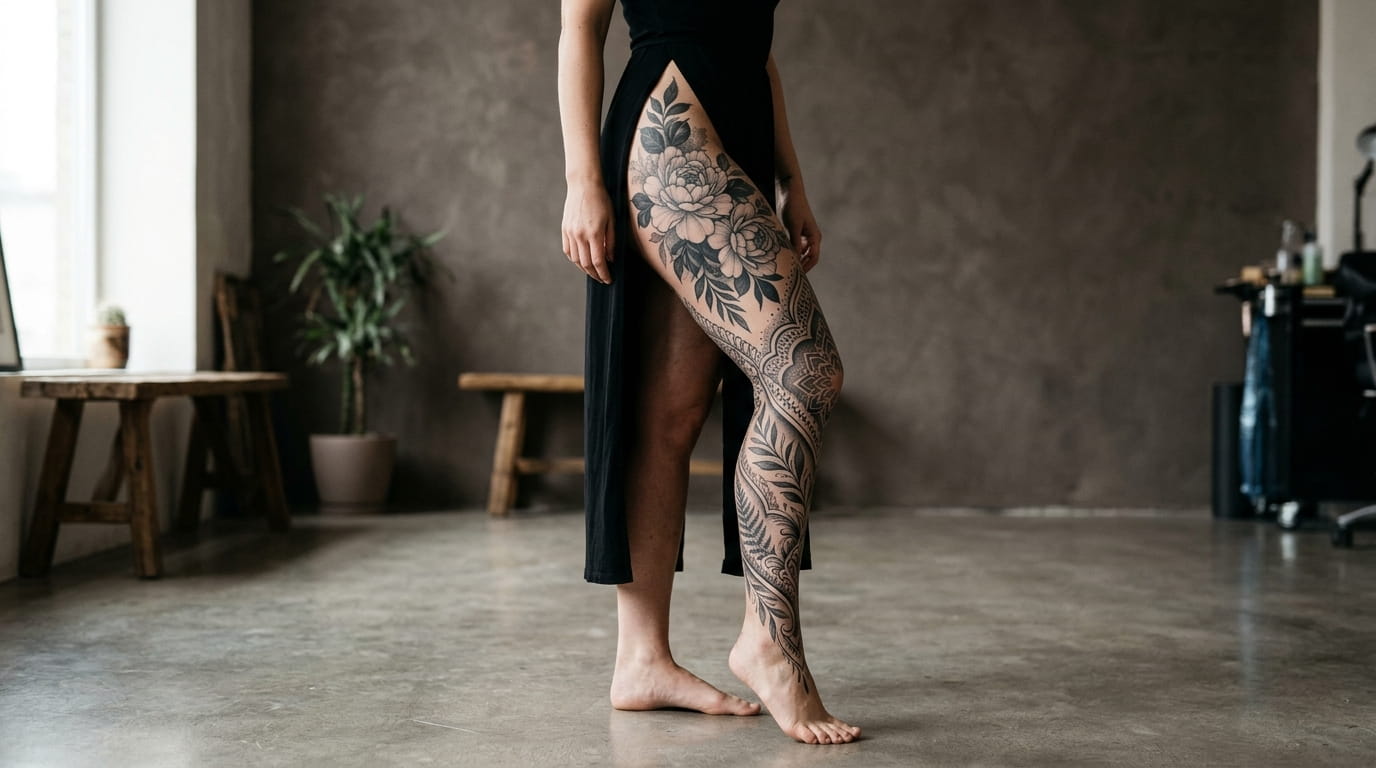
A tattoo that wraps a whole leg is a different kind of commitment than a wrist piece or a small ankle symbol, and most reference photos don’t show that. You find a pretty koi fish or a single flower, but you can’t tell how it reads once it stretches from hip to ankle or fills out a thigh and calf together.
That’s the gap this list of leg sleeve ideas for women is built to close. Every idea here is shown as a full piece, not a cropped detail, so you can see how a design actually sits on a moving leg: where it bends at the knee, how it wraps around the calf, what happens when you’re standing versus sitting.
Some of these are half sleeves that stop at the knee. Others run the whole leg. A few lean into negative space or freehand work instead of a fixed plan. Whatever you’re drawn to, the goal is the same: give you a real sense of scale before you sit down with an artist.
1. Botanical Half Sleeve That Climbs From Hip to Knee
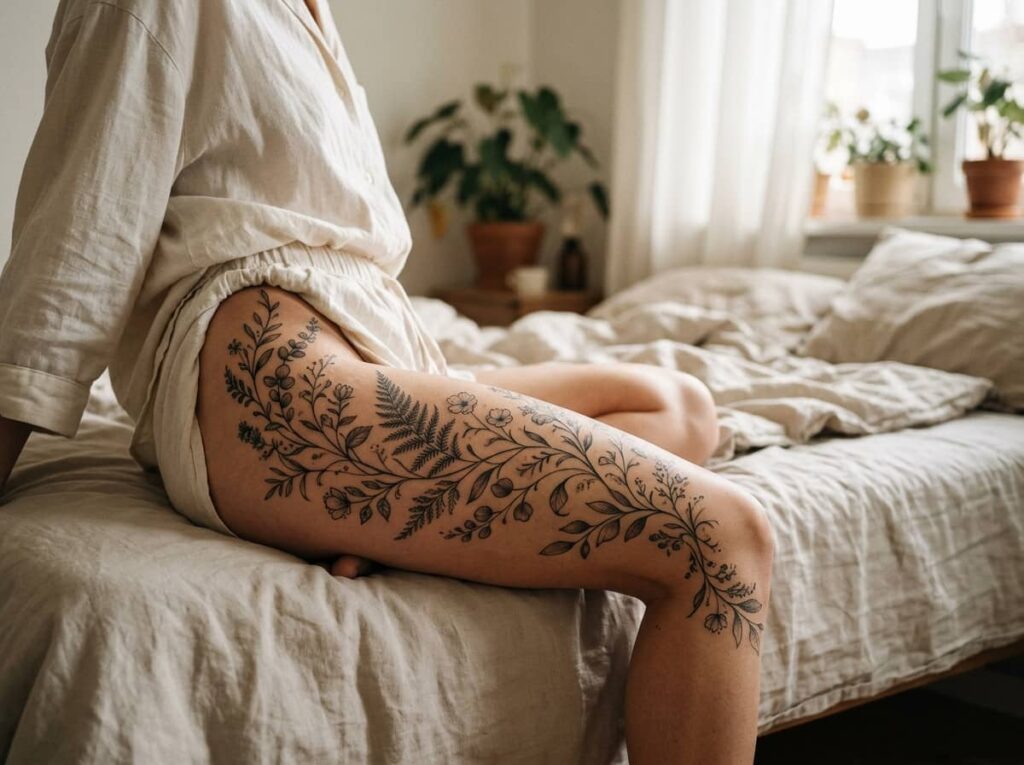
A botanical half sleeve on the upper leg gives you room for real detail without covering the whole limb.
- Trailing leaves and vines that taper toward the knee
- One or two open blooms as focal points
- Tight buds filling in the smaller gaps
Most artists start near the hip crease and work downward, so the vine thins out naturally instead of stopping in a hard line. It also leaves the lower leg open for a second piece later if you decide to extend it.
2. One Continuous Vine Linework Design for a Full Leg Wrap
Full leg sleeves built from a single unbroken line turn the whole limb into one continuous drawing, not separate scenes stitched together.
Getting there takes planning across more than one sitting. Artists map the full path first, sketching where the line climbs, loops, and doubles back before any ink goes down, since one wrong turn changes everything after it.
Expect the design to feel sparse after the first sitting. The shape only reads as a vine once enough of the path is filled in, so the middle sessions matter more than they look.
Map the full path first, deciding where the line climbs, loops, and doubles back before anything is inked.
Ink the first pass as a light continuous guide, even though it will look sparse on its own.
Fill in the remaining sections over later sessions until the full path reads as one complete image.
3. Japanese-Inspired Koi and Wave Sleeve for the Outer Thigh
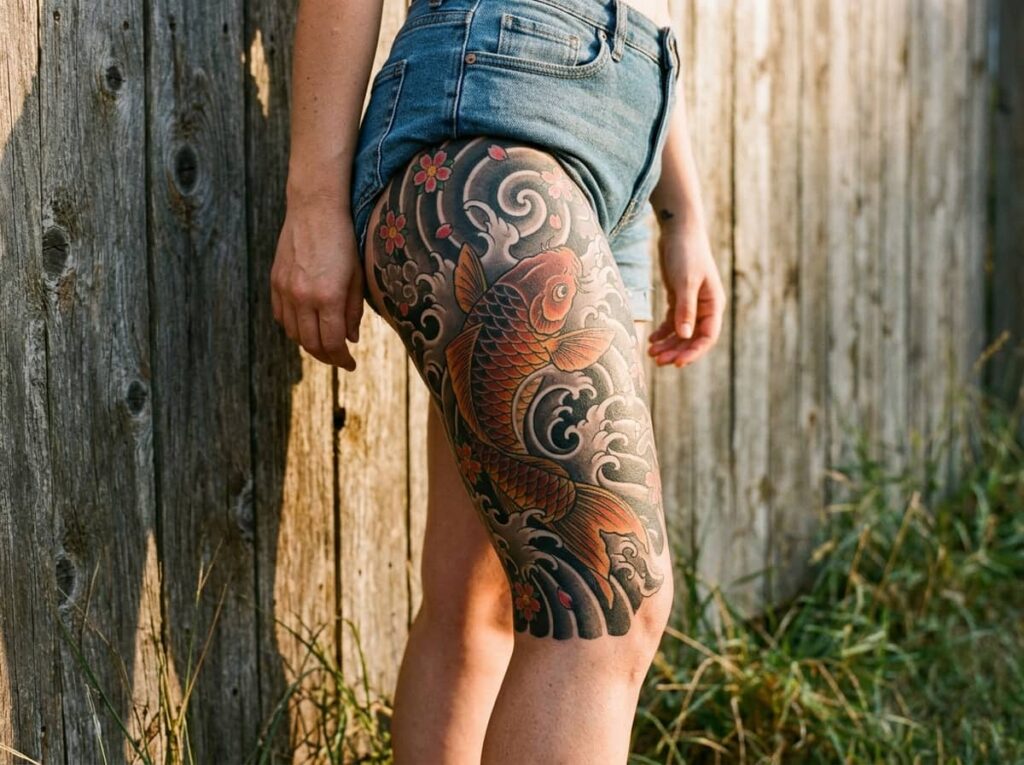
Koi and wave sleeves tend to start small and grow over time, which makes them a good entry point if you’re not ready to commit to a full leg in one sitting.
A single koi near the outer thigh can stand alone for months before you decide to add the wave panel that wraps it. When you do, the water usually flows upward and around the fish rather than sitting flat behind it, so the whole thing reads as motion instead of a sticker.
Traditional Japanese work leans on bold outlines and solid color fills, which hold up well over years. If you want it to age cleanly, ask your artist about line weight before you add detail.
A single koi panel sitting on its own near the outer thigh.
Waves wrap the koi and climb toward the hip, turning one panel into a full outer-thigh scene.
4. Negative Space Sleeve That Lets Bare Skin Do Half the Work
Negative space work gets a bad reputation for fading fast, but that’s more about execution than the style itself.
The trick is treating the bare skin as a real design element, not just empty gaps left over. Good negative space sleeves use thick, confident black shapes around the untouched areas, so the eye reads the skin as part of the pattern instead of unfinished work.
It tends to look sharpest on leg sleeves because the shin and calf give you long, flat stretches to work with. Shorter or curvier areas make the bare sections harder to keep clean.
💡 Quick Tip
Ask to see healed photos of negative space work specifically, not just fresh ink. It shows you how clean the artist keeps the untouched areas over time.
5. Mandala Panel Centered on the Thigh With a Calf Echo
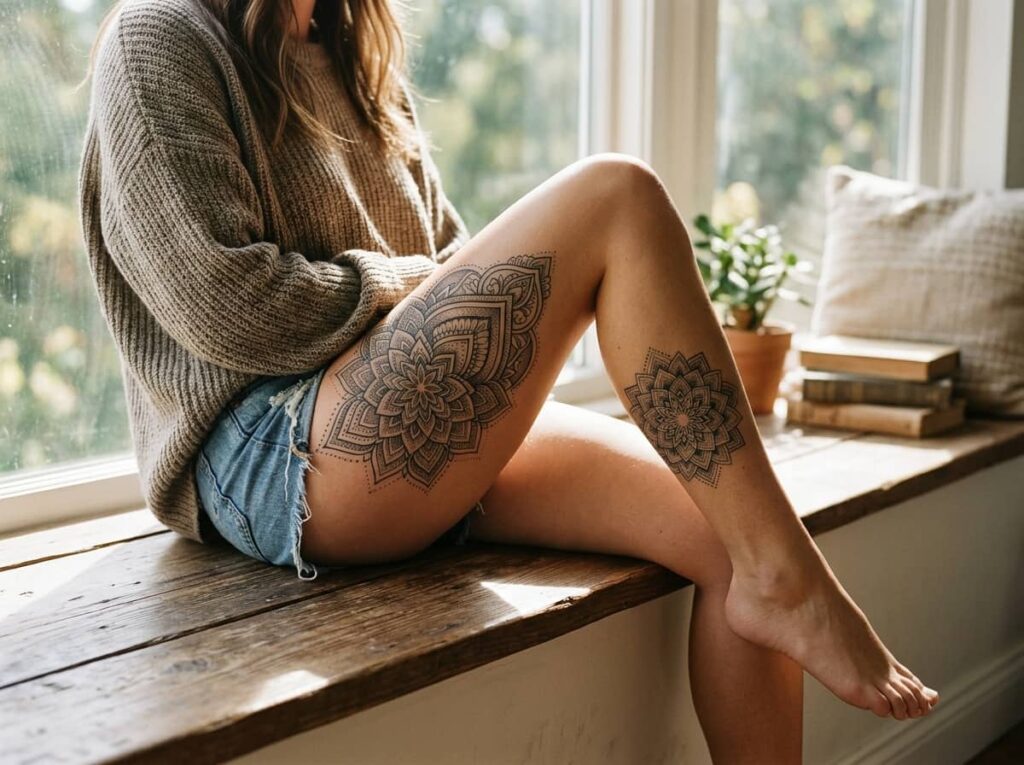
A lot of mandala sleeves lose their shape within a year because the design was centered on a flat reference photo instead of the actual curve of the thigh.
The fix is simple but easy to skip. Ask your artist to sketch the mandala directly on your leg before any lines go down, so the pattern bends with the muscle instead of stretching unevenly when you move.
A smaller echo pattern on the calf, lined up with the main panel, ties the two halves of the leg together without needing a full continuous sleeve. It reads as one idea even with a visible gap at the knee.
Have the design sketched directly on your skin before anything is inked.
Leave breathing room around the center so it doesn’t feel cramped.
Approving a flat paper mockup without trying it on your leg first.
Centering it too close to the knee, where it will distort every time you bend.
6. Watercolor Wash Sleeve With No Black Outlines
People assume watercolor tattoos fade faster than traditional work, but that’s not quite right. The real difference is upkeep, not durability.
Watercolor sleeves rely on soft color blending instead of bold outlines, so they tend to need touch-ups sooner to stay vibrant. Traditional linework holds its edges longer because solid black ink simply ages better than pastel shades.
If you want the dreamy, paint-like look without constant maintenance, ask your artist about a hybrid: thin black guide lines under a watercolor wash. It keeps the shape intact even as the color softens over time.
| Watercolor Wash | Traditional Linework |
|---|---|
| Soft blended color, no hard outlines | Bold black edges holding the shape |
| Needs touch-ups sooner to stay vibrant | Ages slower, edges stay crisp longer |
7. Geometric Sleeve Built From One Repeating Shape
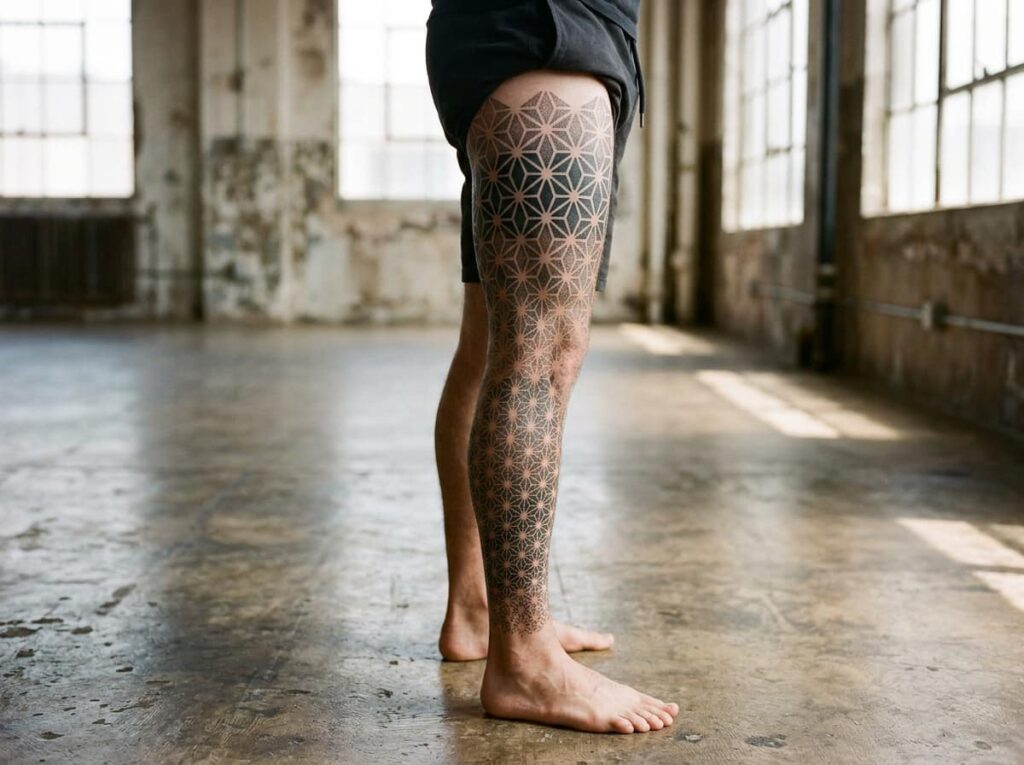
Pick a single shape, a triangle, a hexagon, a simple line pattern, and build the whole sleeve by repeating it at different sizes and angles. Scaling it up near the thigh and shrinking it near the ankle gives the design a natural sense of movement without needing a dozen different elements.
This style rewards precision over improvisation. A shape that’s a few degrees off becomes obvious once it repeats twenty times down a leg, so geometric work leans heavily on an artist who works with rulers and stencils rather than freehand.
It also tends to hold up cleanly over the years since there’s no shading left to blur.
8. Full Leg Nature Scene With a Mountain or Forest Horizon Line
A horizon line running across the shin, with mountains or treetops rising toward the knee, turns the whole leg into a single landscape instead of a collection of separate images.
Front-facing views usually read clearer than side angles, so plan the composition with that in mind before your first sitting. Bring more than one reference photo to the consultation, since a single image rarely translates directly onto a curved leg.
This idea works best for people who want one continuous story running down the leg instead of several smaller, unrelated pieces.
Bring to your consultation
9. Bold Blackwork Sleeve With Minimal Negative Space
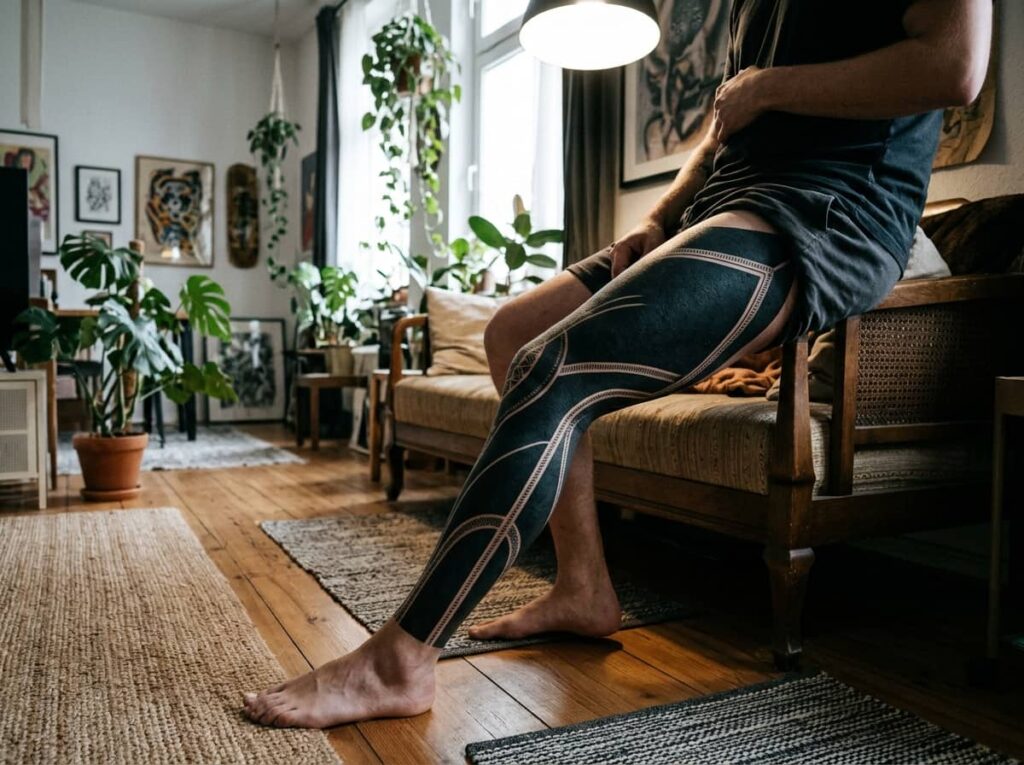
Solid blackwork sleeves don’t leave much room for changing your mind halfway through. Once large areas are filled in, there’s no erasing a shape that doesn’t fit, so commit to the full composition before the first session instead of deciding scene by scene.
The payoff is a sleeve that reads clearly from across a room, no squinting at small details required. Heavy black ink also tends to age better than fine linework, since there’s more pigment holding the shape over time.
Keep a few thin, untouched lines running through the black. They give the design depth instead of letting it read as one flat block.
Commit to the full shape before the first session. Blackwork doesn’t forgive changes made halfway through.
10. Floral Sleeve Paired With a Single Meaningful Word
Adding a single word to a floral sleeve gives the piece a personal anchor without turning it into a full quote tattoo. The flowers carry the visual weight, and the word carries the meaning.
Placement matters more here than people expect. Script tucked into open space between blooms reads cleaner than text layered directly over petals, where it tends to get lost once the ink settles.
- Along the outer calf, where the line is straight enough to keep letters even
- Just above the ankle, framed by smaller buds instead of large blooms
- Running vertically up the shin for a word read top to bottom
Keep the word short. Long phrases lose their shape once they wrap around a curved leg.
- ▸Outer calf, where the line is straight enough to keep letters even.
- ▸Just above the ankle, framed by small buds instead of large blooms.
- ▸Vertically up the shin, for a word meant to be read top to bottom.
11. Moon Phase Sleeve Climbing the Shin Toward the Knee
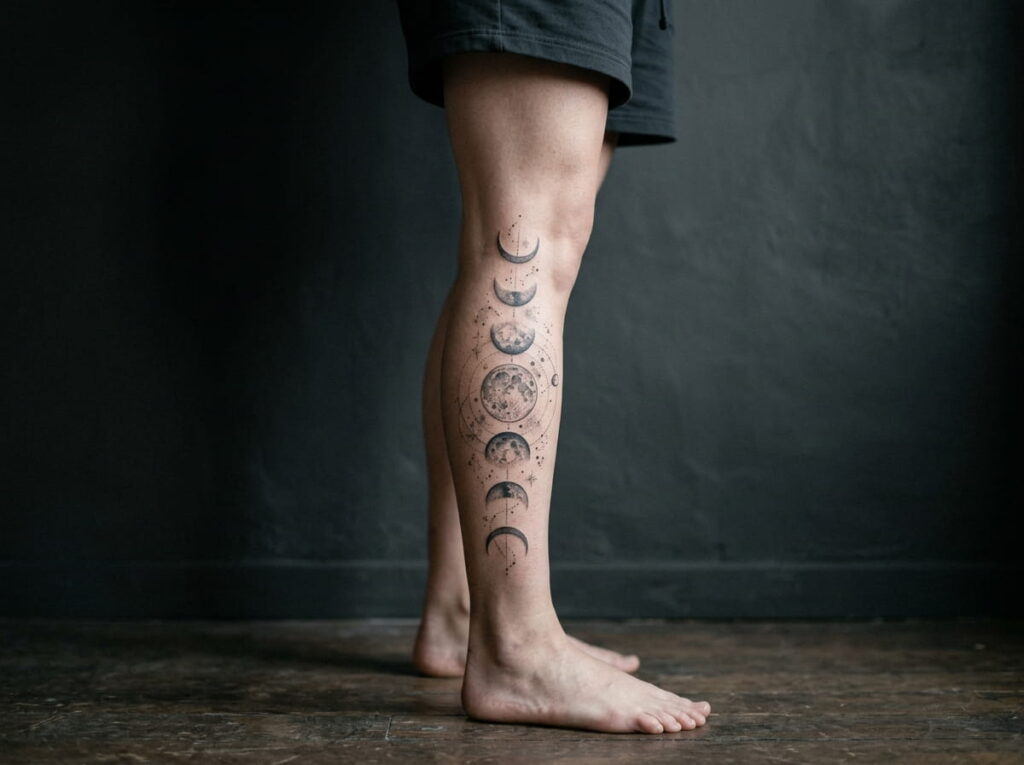
Eight small moons, from a thin crescent to a full circle, climbing the shin toward the knee gives you a sleeve with a built-in sense of direction. The eye naturally follows it upward instead of landing flat.
Spacing is the part people get wrong. Even gaps between each phase matter more than the size of any single moon, since uneven spacing throws off the whole progression once it’s finished.
This idea works equally well as a standalone half sleeve or as one panel inside a larger celestial design.
12. Animal Portrait Sleeve Built Around One Favorite Creature
A dog, a lion, a wolf, whatever creature means something to you. The trick with a portrait sleeve is turning a flat photo into something that works as a tattoo instead of a copy.
- Pick a reference photo with strong, clear lighting rather than a dim or blurry one
- Decide whether you want full realism or a more stylized linework version
- Ask your artist to sketch the face at actual size on your leg before inking
Realism takes more session time and more touch-ups down the road. A stylized version ages easier but trades away some of the detail that makes the original photo feel personal.
Choose a reference photo with strong, even lighting and a clear angle on the face.
Decide between full realism and a stylized linework version before the design stage.
Have the design sketched at actual size directly on your leg before any ink goes down.
13. Lace-Pattern Sleeve Wrapping the Calf Like a Stocking
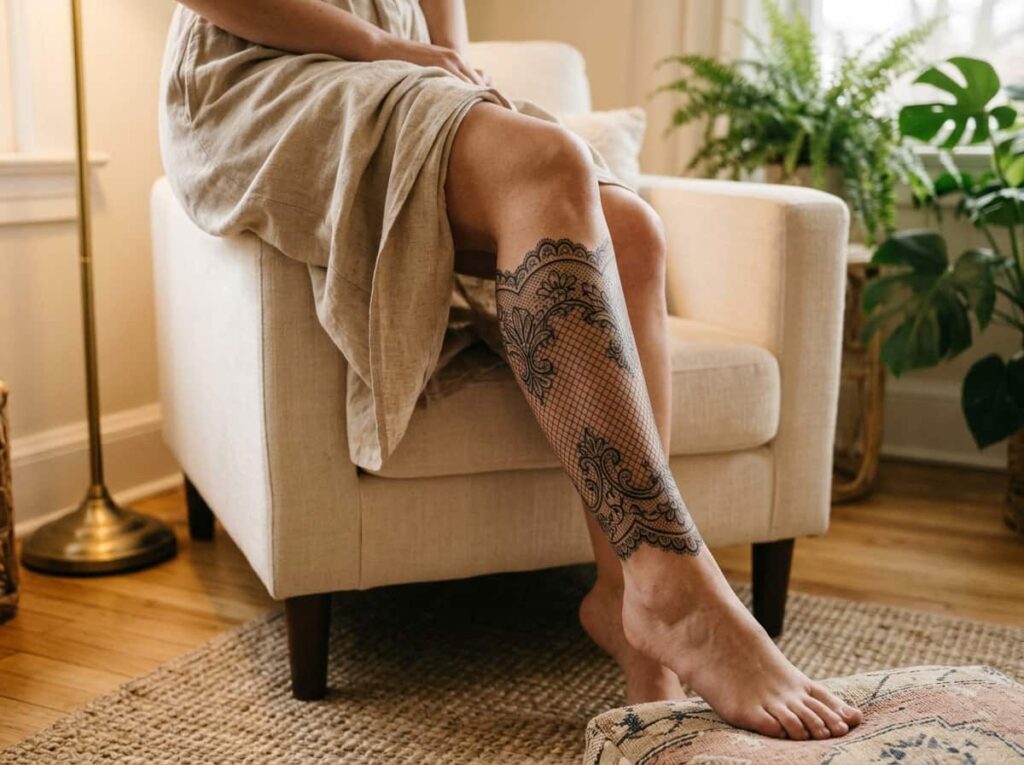
There’s something quietly elegant about a lace pattern wrapping the calf the way a stocking would. It reads as delicate from a distance but holds a surprising amount of fine detail up close.
The design usually starts as a plain calf and builds outward in layers: a base net pattern first, then scalloped edges, then small floral or dot accents filling the remaining gaps. Each layer can be its own sitting if the detail is fine.
Lace work asks a lot of an artist’s steady hand, so this is one to book with someone who has fine-line experience specifically.
A plain calf with no pattern to work from.
A full lace wrap built in layers, from the base net to the finishing floral accents.
14. Two-Tone Sleeve That Mixes Color Panels With Black Ink
Mixing color into a mostly black sleeve gives you one or two panels that pull focus, instead of asking every inch of the leg to compete for attention. A single colored flower inside an otherwise black botanical sleeve works for exactly this reason.
Before your first session, work through which sections get color and which stay black. Getting this settled early keeps the design from feeling like color was added as an afterthought.
Questions to settle before inking
15. Freehand Sleeve Designed One Session at a Time Instead of All at Once
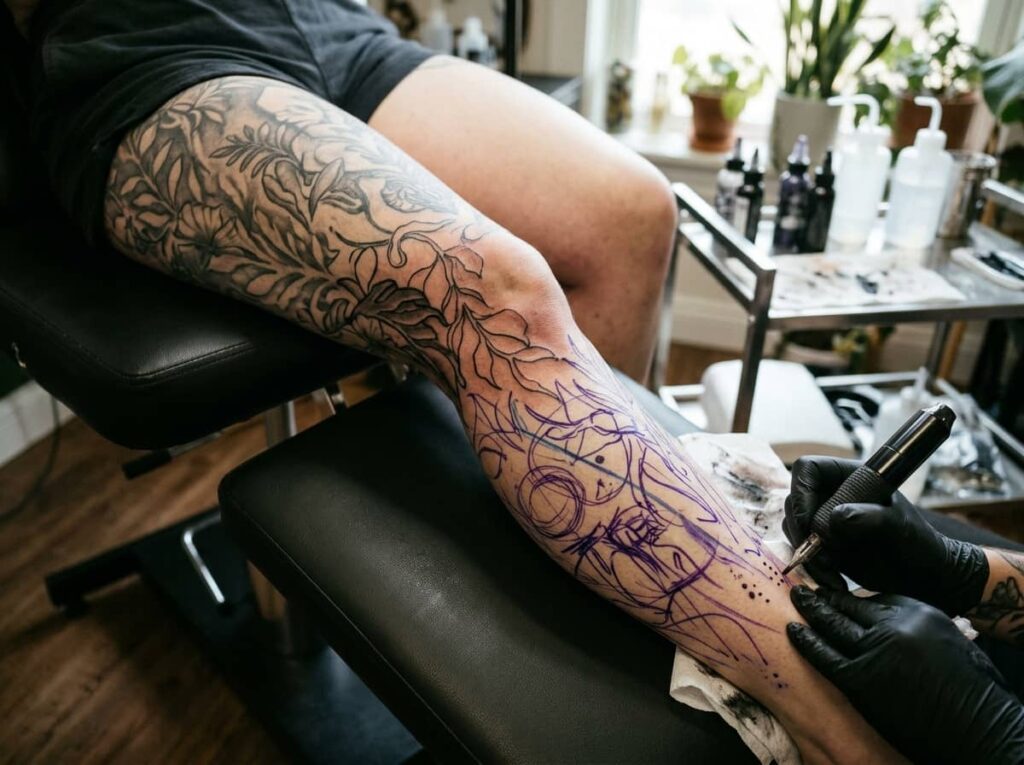
Not everyone wants a full sleeve mapped out before the first needle touches skin. Freehand sleeves build session by session, with the artist drawing directly on your leg each time based on what’s already there.
This approach fits people who want the sleeve to grow organically, or who aren’t ready to commit to one locked-in design. It does mean more trust placed in a single artist’s style, since there’s no master plan to fall back on if sessions span a longer timeline.
Stick with one artist for every session so the style stays consistent.
Leave real gaps of time between sessions so the design can evolve naturally.
Switching artists partway through, which breaks the visual thread.
Rushing all the sessions close together without time to see how it reads.
Conclusion
A leg sleeve is one of the bigger commitments you can make with ink, but it doesn’t have to start as one giant decision. Half sleeves, single panels, and freehand builds all give you a way in without locking you into a full leg right away.
Whichever direction you lean, the goal is the same: a design that actually works with the shape of your leg instead of fighting it. Use these leg sleeve ideas for women as a starting point for your next consultation, not a final answer, and let your artist help you adjust scale and placement from there.
Save this list for the next time you’re planning out a piece.
📌 Good To Know
Bring more than one reference photo to your consultation. A single image rarely translates cleanly onto a curved leg.







Leave a Reply