
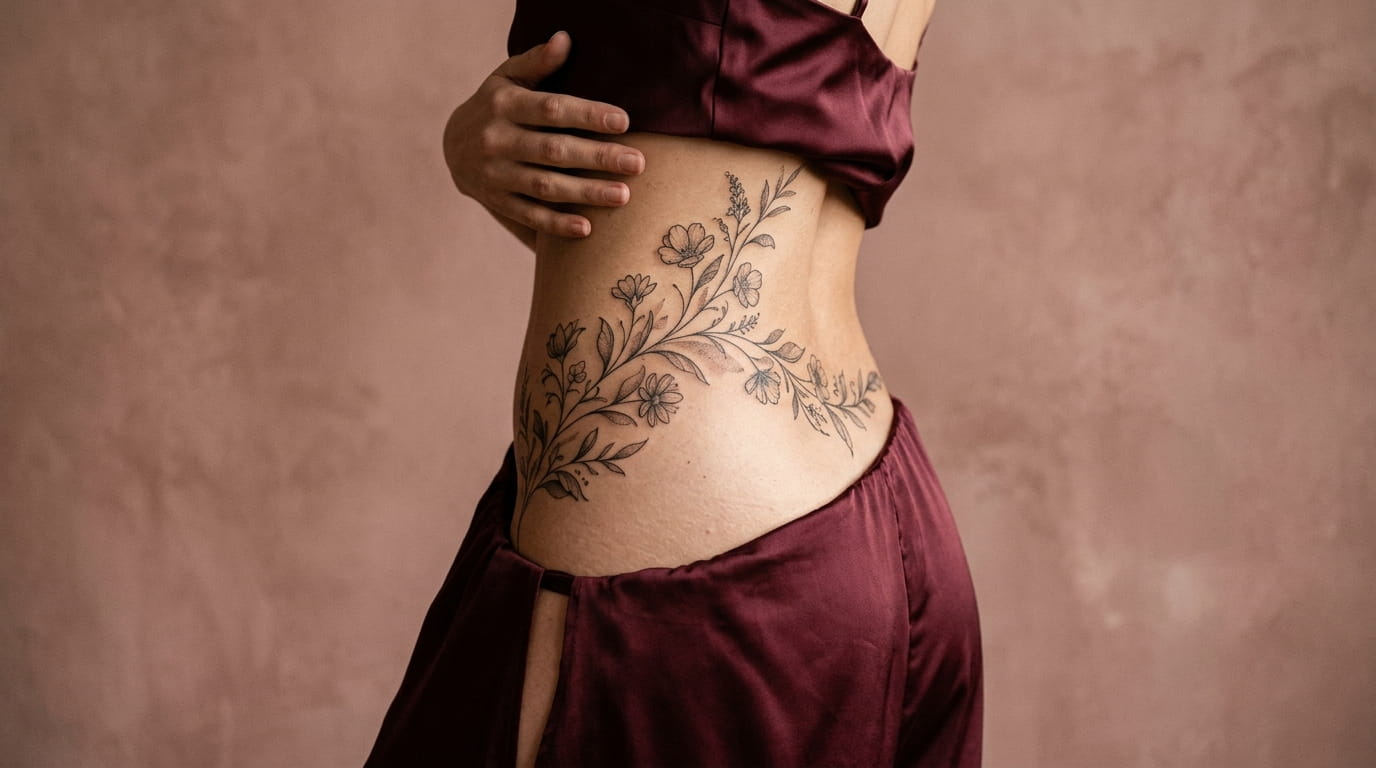
Most hip tattoo ideas look great on someone else’s body and a little off on yours. That’s not bad luck. It’s bad planning. The hip is curved and it moves, and artwork drawn flat on paper doesn’t always bend the way a waistline actually does.
Hip tattoos for women hold up best when the design follows the shape it sits on instead of fighting it. A vine that dips into the natural curve above the hip bone reads completely differently than the same vine stretched out straight. Placement and fit matter as much as the artwork itself.
This list sticks to ideas built around a hip’s real lines, from small side pieces to full wrap-around waistline designs. Some stay quiet and small. Others wrap further around the body, and a few are made to pair with a second piece on the opposite hip. Pick the one that matches how much skin you want to use and how bold you want it to read from across a room.
1. A single-line vine that traces the curve of your hip bone
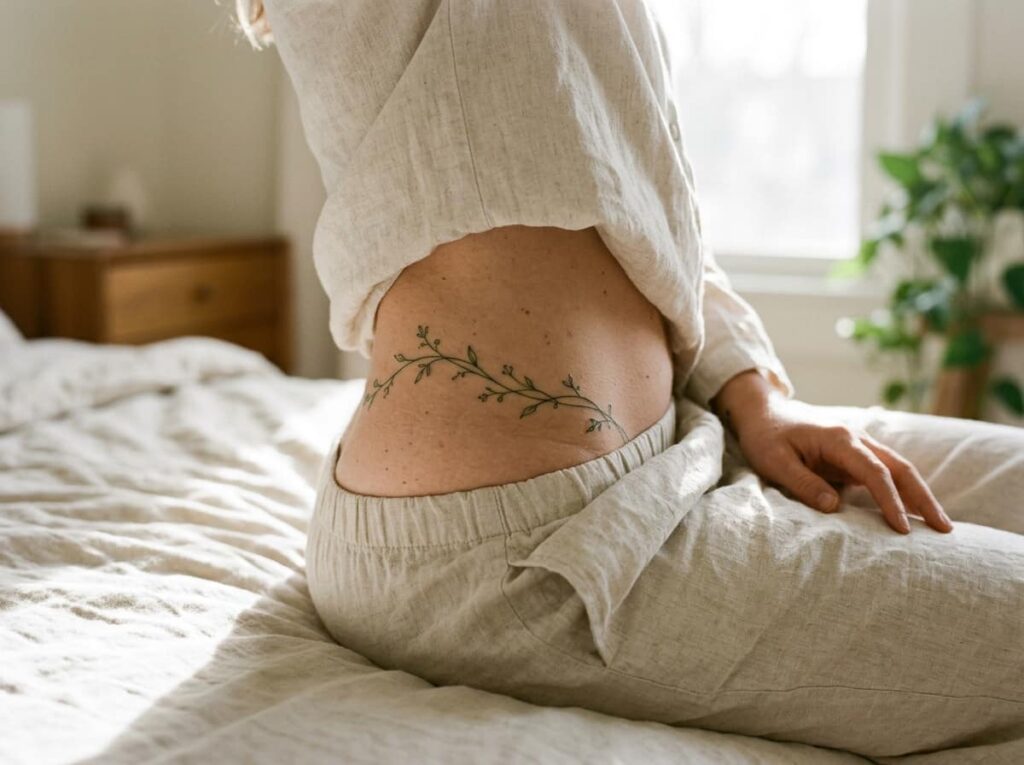
The best hip vines don’t sit in a straight row. They lean into the curve right above the bone, bend slightly where the waist dips in, and taper off near the top of the thigh.
That bend is what makes it look drawn for your body instead of copied off a flat stencil. A single continuous line, about the width of a pencil tip, ages better than a thick outline and heals faster too. Ask your artist to draw it directly on your skin while you’re standing, not lying down, so you can see how it actually sits.
2. A wrap-around floral band that follows your natural waistline
A wrap-around band gives you more room to work with than a single side piece. Before you book anything, decide on three things with your artist.
- How far around the waist the band should travel
- Whether the flowers stay one size or get smaller as they wrap
- Where the design meets, or stops, at the back
Smaller flowers near the spine and larger ones near the front hip bone usually look more natural than a band that’s the same size all the way around.
💡 Quick Tip
Ask for a stencil fitting in two parts, front and back, so the band lines up correctly when you’re standing instead of bent over a table.
3. A delicate chain-link design that mimics body jewelry
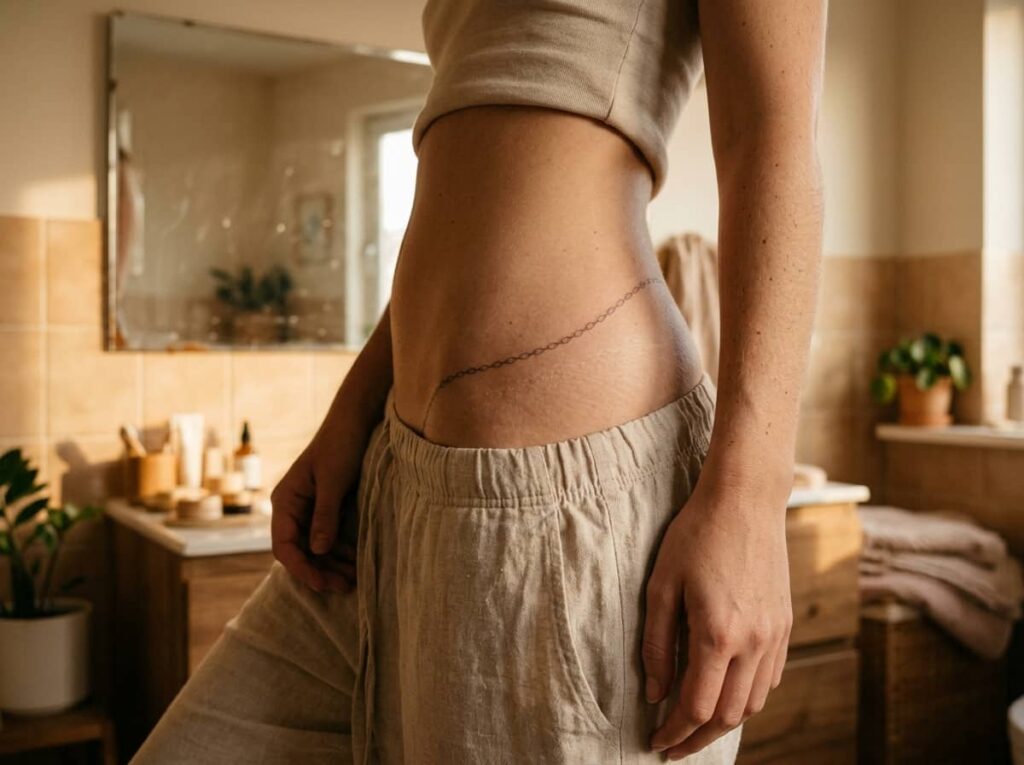
A lot of people assume chain-link tattoos look dated, left over from a specific decade of flash art. That’s only true of the thick, bold-outline version. A fine-line chain, kept thin and close to the skin, reads more like a piece of jewelry than a tattoo trend.
The difference comes down to weight and spacing. A heavy chain with wide links photographs well but blurs fast. A thin chain with tight, even links holds its shape for years and sits closer to the body, which is exactly what makes it look like something you’re wearing rather than something drawn on.
Ask for thin, even links no wider than a pencil line.
Keep the chain close to the hip, not floating over it.
A thick chain outline with no shading detail.
Uneven link sizes that bunch up at the curve.
4. A trailing wildflower cluster that fades toward the lower back
This one works in stages rather than as one dense cluster. The flowers start fuller near the front of the hip, then thin out into single stems and loose petals as they move toward the lower back, so the eye follows a path instead of landing on one busy spot.
Spacing is what sells this design. Too tight and it reads as a solid patch. Too spread out and it loses the sense of movement. A good artist will sketch the full path on your skin first and adjust the gaps before any ink goes in.
Start with two or three fuller blooms at the front hip.
Taper into smaller buds and single stems moving back.
End with a few loose petals, not a hard stopping point.
5. A crescent moon and star scatter along the hip crest
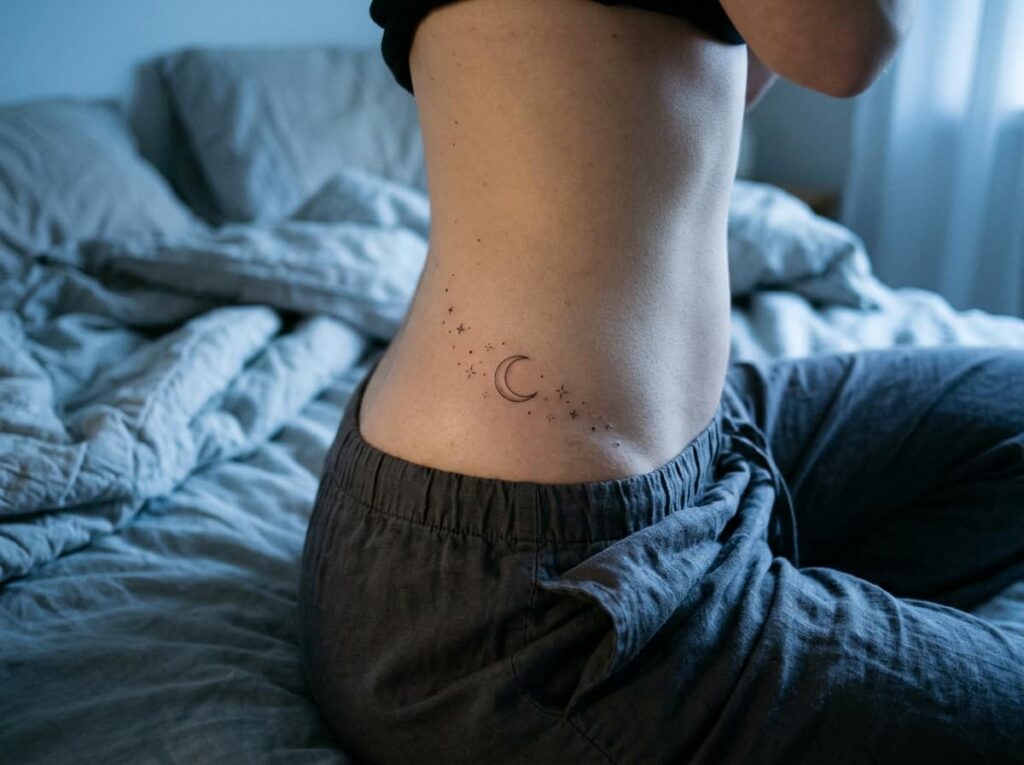
You’re standing in front of the mirror after a shower, hip bone catching the light, and that’s usually the moment people picture when they ask for this design. A few small stars and a slim crescent, placed right along the highest point of the hip, follow that same line without needing a full sleeve of detail to look finished.
Keep the scatter uneven. Three stars of the same size in a straight row looks printed. Three different sizes, spaced a little unevenly, looks like something that was actually placed by hand.
6. A fine-line snake that coils around the side of the hip
Snake tattoos get a bad reputation they don’t fully deserve. People picture something bulky and cartoonish, but a slim, single-line snake that wraps once around the side of the hip reads as sleek, not spooky.
Before you sit down for this one, think through the details with your artist.
- Scale pattern: simple diamond outline versus fuller texture
- How many times the body coils, usually once or twice is enough
- Whether the head rests near the hip bone or tucks toward the back
A snake with too much detail packed into a small space will blur within a few years. Keep the scales simple if the piece itself is small.
Before you book this one
7. A geometric dotwork pattern that outlines the hip bone
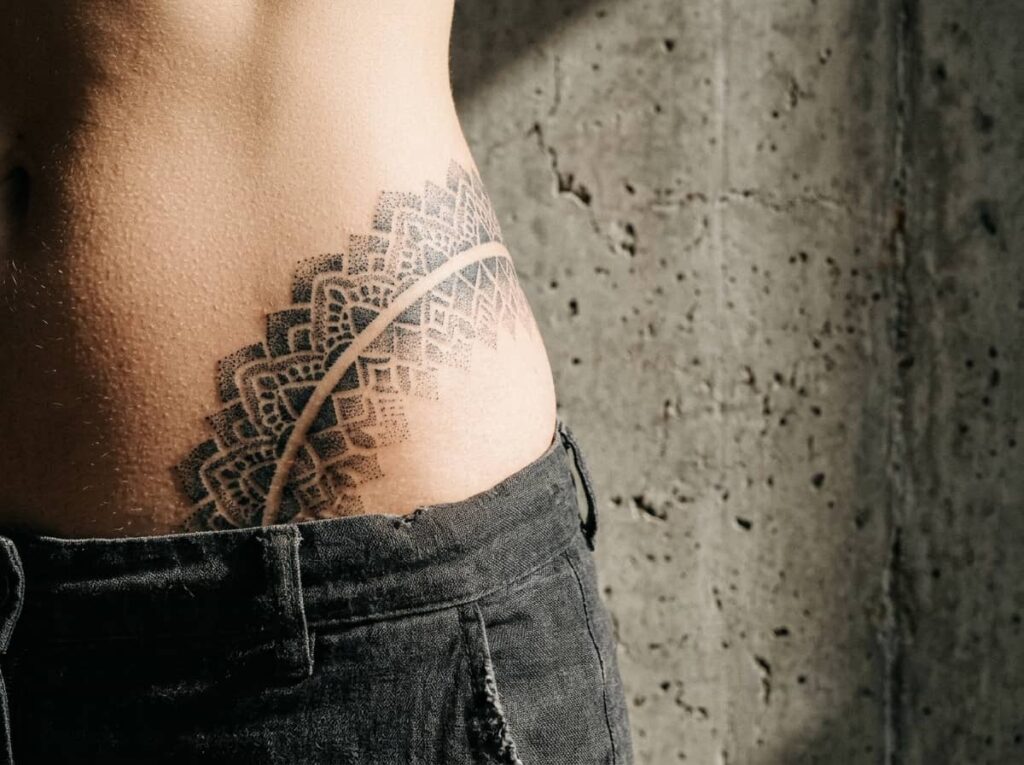
Dotwork takes longer in the chair than most line work, and it’s worth knowing that going in. Instead of a continuous outline, the design is built from hundreds of tiny dots, shaded more densely where you want shadow and sparser where you want highlight.
The payoff is a design that looks almost sculptural against the curve of the hip, like the bone itself is casting a shadow rather than being outlined by ink.
Dotwork sessions run longer than line work of the same size, so budget extra chair time, not just extra skin.
8. A watercolor-style wave that washes across the waistline
Watercolor tattoos look incredible in a portfolio photo and need the most honest conversation of any style on this list. The soft color bleed that makes them beautiful is also what makes them fade fastest, especially on a part of the body that sees regular friction from waistbands.
| Watercolor only | Watercolor plus linework |
|---|---|
| Softer, dreamier look right after healing | Holds its shape longer under clothing friction |
| Color bleed fades fastest in the first few years | Black outline anchors the design as color softens |
If you love the wash effect, ask your artist to add a thin black line beneath it. That line is what’s still visible a decade from now, long after the color has mellowed.
| Watercolor only | Watercolor + linework |
|---|---|
| Softer look right after healing. | Holds shape longer under waistband friction. |
| Color bleed fades fastest, within a few years. | Black outline still reads a decade later. |
9. A butterfly trail that drifts from hip to lower back
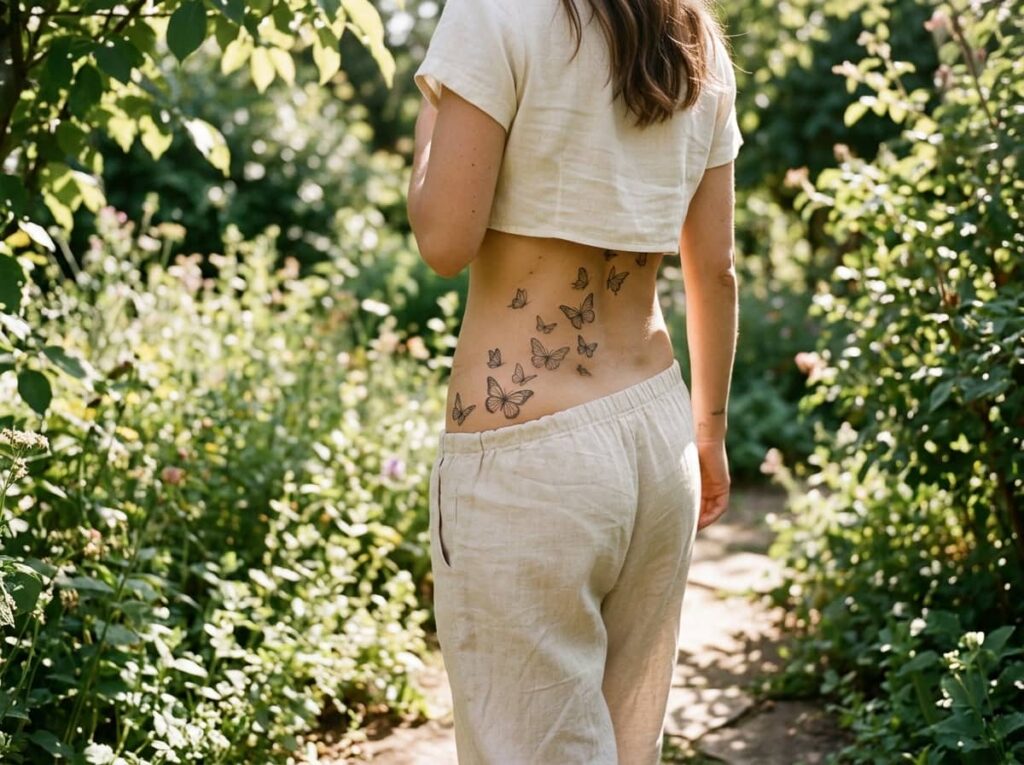
Where this one usually goes wrong: three or four identical butterflies, same size, same angle, marching in a straight line like a border pattern. It ends up looking stamped instead of drawn.
What actually works is variation. Change the wing angle on each one, vary the size so they shrink slightly as the trail moves back, and leave uneven gaps instead of spacing them like a ruler was involved.
Four matching butterflies in a straight, evenly spaced row.
Varied sizes and wing angles, uneven gaps, drifting naturally back.
10. A script phrase that curves gently along the hip line
Script tattoos live or die on font choice. A font that looks elegant printed on paper can turn illegible once it’s bent to follow a hip curve, especially if the letters are tall or heavily looped.
Test the font on your actual skin before committing. Most shops can print a stencil in two or three font options so you can see, standing up, which one still reads clearly once it follows the curve instead of sitting flat.
📌 Good To Know
Shorter words curve more cleanly than long phrases. If your phrase runs long, consider splitting it across both hips instead of cramming one line.
11. A mandala centered just above the hip bone
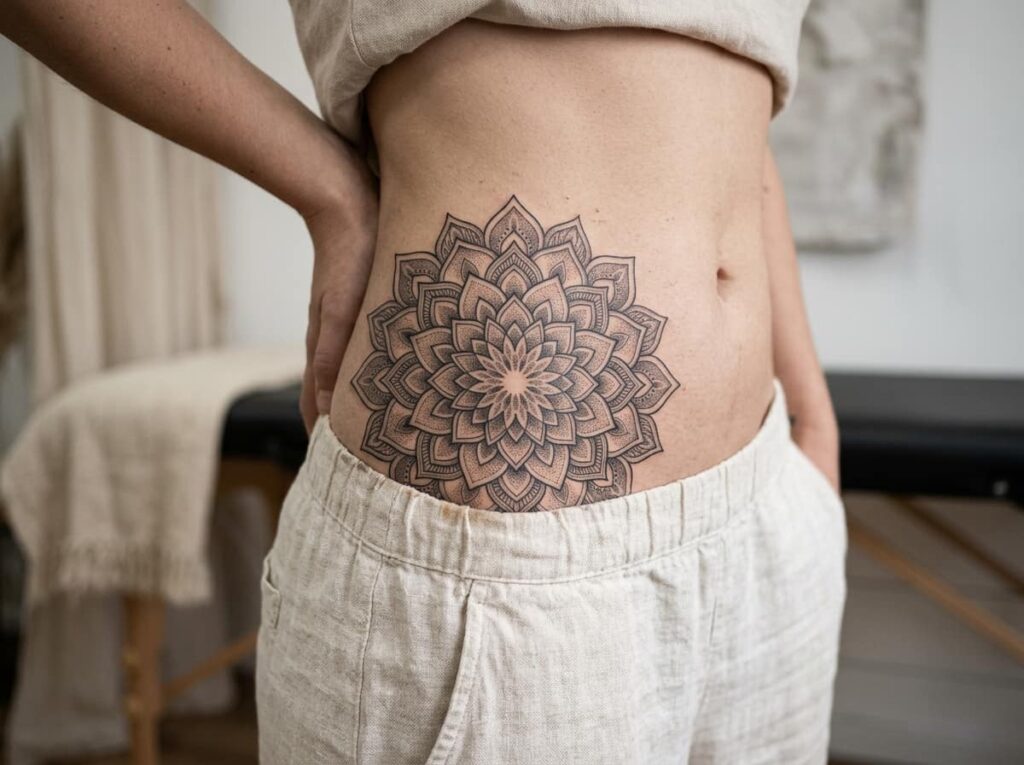
A mandala rewards close-up attention in a way most hip tattoos don’t. From a few feet away it reads as one balanced shape, but step closer and there’s a full pattern of smaller lines, dots, and petals radiating out from the center.
That detail only holds up if the size is right. Go too small and the inner pattern turns into a blurry smudge within a few years. A mandala needs real room to breathe.
12. A sun and moon pairing split across both hips
Splitting one design across two hips is a different kind of commitment than a single side piece. You’re planning two tattoos that only make full sense together, which changes a few things about how you approach it.
- Both sides need separate healing time, so plan two appointments, not one long one
- A mirrored design (sun on the left, moon on the right) tends to balance visually better than two matching suns
- Sitting for both pieces close together means double the aftercare window
Most artists recommend spacing the two sessions two to three weeks apart so each side heals before the other begins.
- ▸Book both sessions two to three weeks apart.
- ▸Mirror the design rather than matching it exactly.
- ▸Plan for two full aftercare windows, not one.
13. A thin blackwork arrow pointing along the waistline
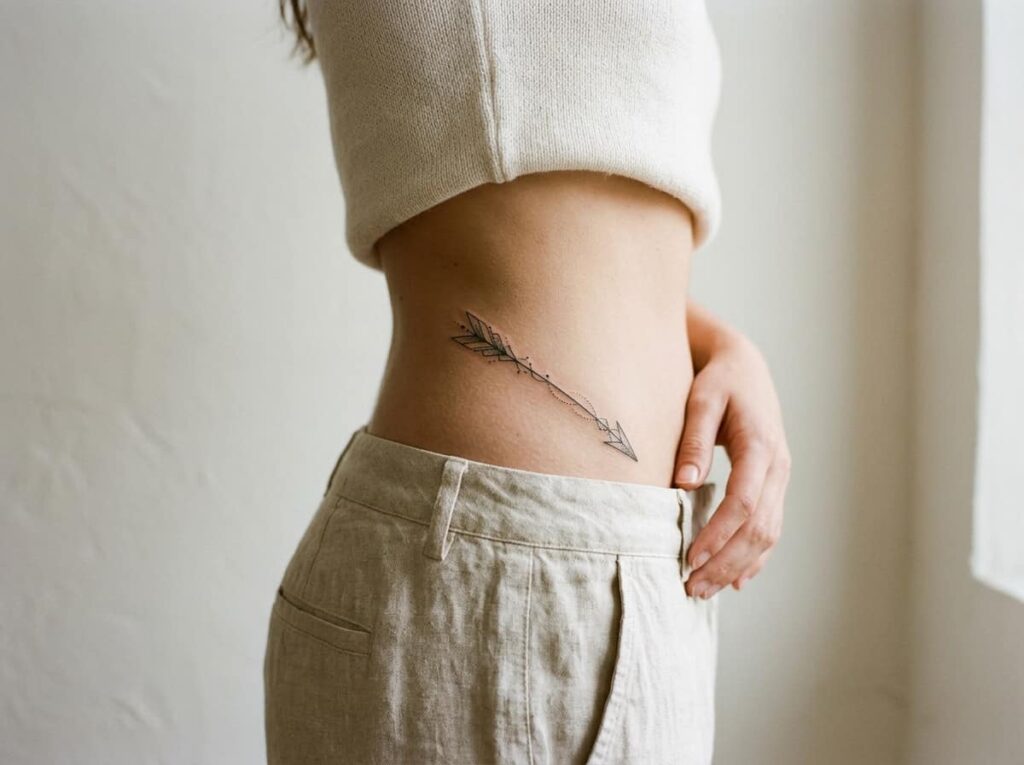
People tend to either love arrow tattoos or write them off as a trend that peaked years ago. The ones that still look good today share a few things the dated versions usually skip.
Keep the line thin and the fletching simple.
Angle it to follow the waistline, not straight across it.
Thick cartoon-style fletching with heavy shading.
A perfectly horizontal arrow that ignores body shape.
A thin, well-angled arrow ages quietly instead of looking like a snapshot of a specific year.
14. A ribbon-style wrap that frames the entire waistline
This is the biggest commitment on the list, and it earns that spot honestly. A full ribbon wrap circles most or all of the waistline, often with a bow, knot, or loose trailing ends somewhere along the path.
Before you book it, get clear on a few things with your artist.
- Whether the ribbon meets at the back or stays open
- How wide the ribbon is, since width affects total healing time
- Whether you want a flat ribbon or one with shading that gives it dimension
Given the size, most artists split this into two sessions rather than one long sitting.
Before you commit to a full wrap
Conclusion
The best hip tattoos for women share one thing in common: they’re drawn to fit the body, not stretched over it. A vine that bends with your waist, a band that’s sized to your actual shape, a wrap that’s planned for how you move, not just how you stand still in a photo.
Start small if you’re unsure. A single-line piece or a short trail of flowers tells you a lot about how you’ll feel with ink in that spot before you commit to something that circles your whole waistline. And if you do go bigger, give yourself the extra sessions a wrap-around or mandala actually needs. Rushing the size is where most regrets start.







Leave a Reply