
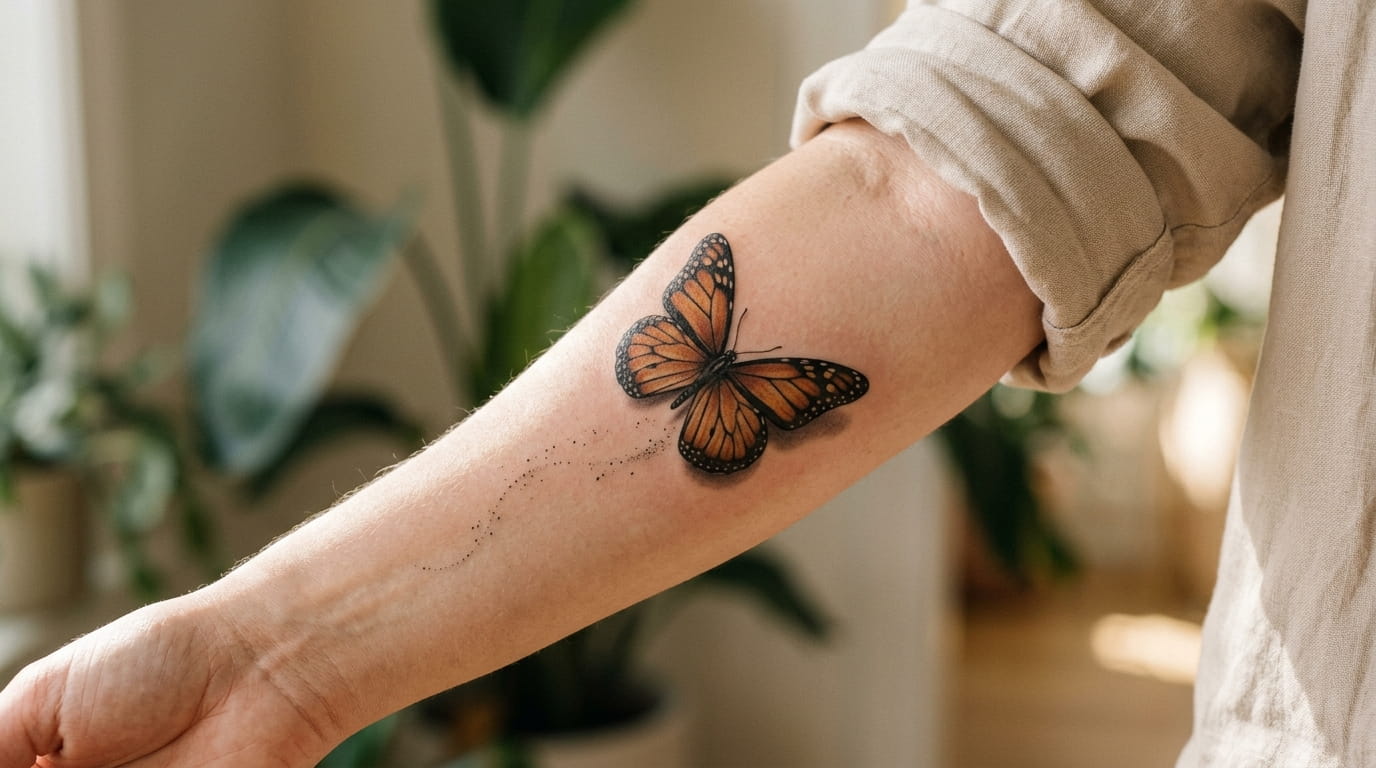
Most people pick a butterfly tattoo spot the way they pick a seat in a waiting room. Wherever there is space. The finished butterfly then sits flat and still, like a sticker on a laptop.
The spot is only half of it. What makes a butterfly look mid-flight is direction: which way the head points, how far the wings tilt, and whether the body follows a natural line like a collarbone or a rib curve.
Good butterfly tattoo placement works like a photo of a real butterfly. Your eye follows it somewhere. If the head points at nothing, the whole design feels stuck.
Here are 13 placement ideas, each with a clear angle and flight direction you can show your artist. Some are quick fixes and some need a stencil test. Start with the first one, because it changes how you read every other spot.
1. Pick the Direction Before You Pick the Spot: Where Is Your Butterfly Headed?

Decide where the butterfly is going first. The spot comes second.
Ask yourself three quick questions:
- Is it moving toward me, away from me, or up and out?
- Which side will people see most often?
- Is the story about hope, escape, or a gentle goodbye?
Write your answers on a sticky note and take it to the consult. An artist can tilt a stencil in seconds, but nobody can guess the story you want it to tell.
A butterfly reads as flying toward whatever its head points at. Choose that target first, then place the rest of the design around it.
2. Tilt the Wings 15 to 30 Degrees Off Vertical So the Body Looks Like It Is Moving
Here is a tiny rule that fixes a lot. Never let the body stand straight up and down.
A perfectly vertical butterfly looks pinned to a board. A small tilt, roughly 15 to 30 degrees, makes it look like it just turned in the air. That is a rule of thumb, not a law. A wide spot like the outer thigh can handle more tilt than a narrow wrist. Hold a printed stencil against your skin and rotate it slowly until it looks caught in motion.
Print the design at real size and tape it on with the body standing upright.
Rotate it a little at a time and check the mirror after each turn.
Stop when the upper wing looks like it is lifting. Mark that line and take a photo.
3. Point the Head Toward Your Heart for a Forward, Hopeful Feel
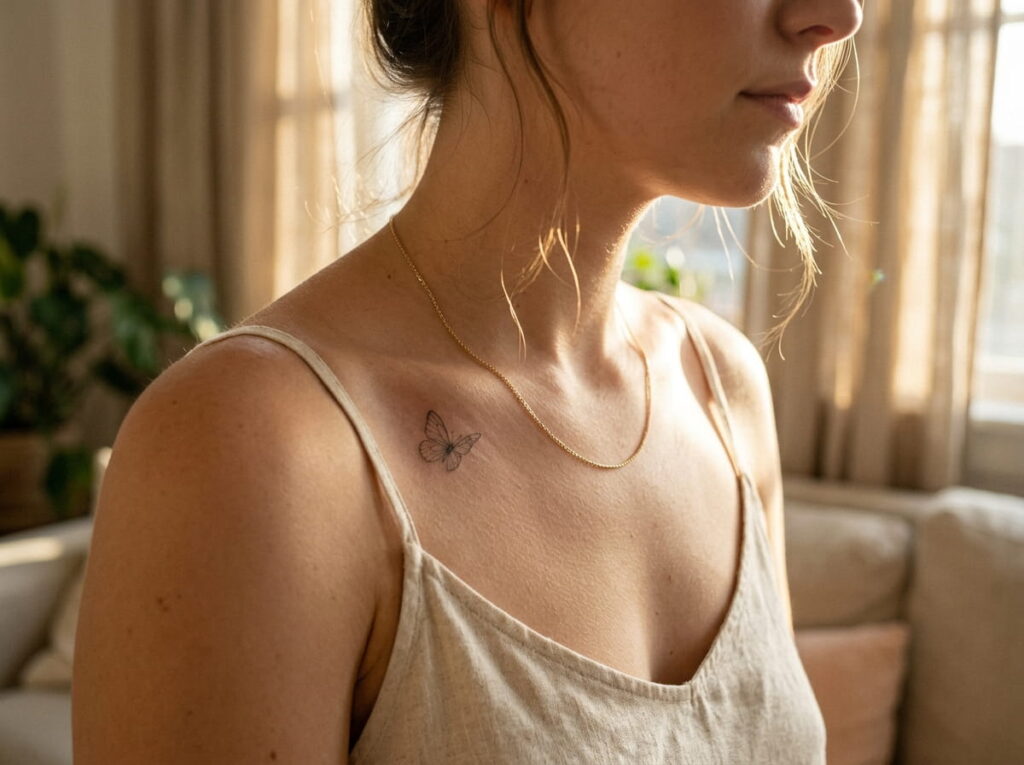
A butterfly that faces your chest looks like it is heading home. It reads as personal and a little protective, which is why it shows up so often on memorial and family pieces.
It works best in three spots:
- The left collarbone, head angled down and inward
- The upper ribs, head tilting toward the sternum
- The inner upper arm, head facing the torso
Keep the wings slightly open so the flight still looks active. Wings fully closed with the head inward can read as resting.
4. Face the Wings Away From the Body for a “Leaving” Look
People get this backwards all the time. They place a hopeful butterfly facing inward, then wonder why it feels heavy.
If your story is about moving on, flip it. Point the head and the leading wing away from your center, toward the shoulder, hand, or hip. The eye leaves the body with it, and that exit is what says release. Leave some empty skin in front of the head. A butterfly with room ahead of it looks like it has somewhere to go, and one pressed against an edge looks trapped.
| Facing the body | Facing away |
|---|---|
| Feels close and calm | Feels open and free |
| Suits memorial and family stories | Suits new chapters and recovery |
| Can look crowded on small areas | Can look cut off near an edge |
5. Butterfly Tattoo Placement Along the Collarbone: Follow the Line So It Looks Lifted
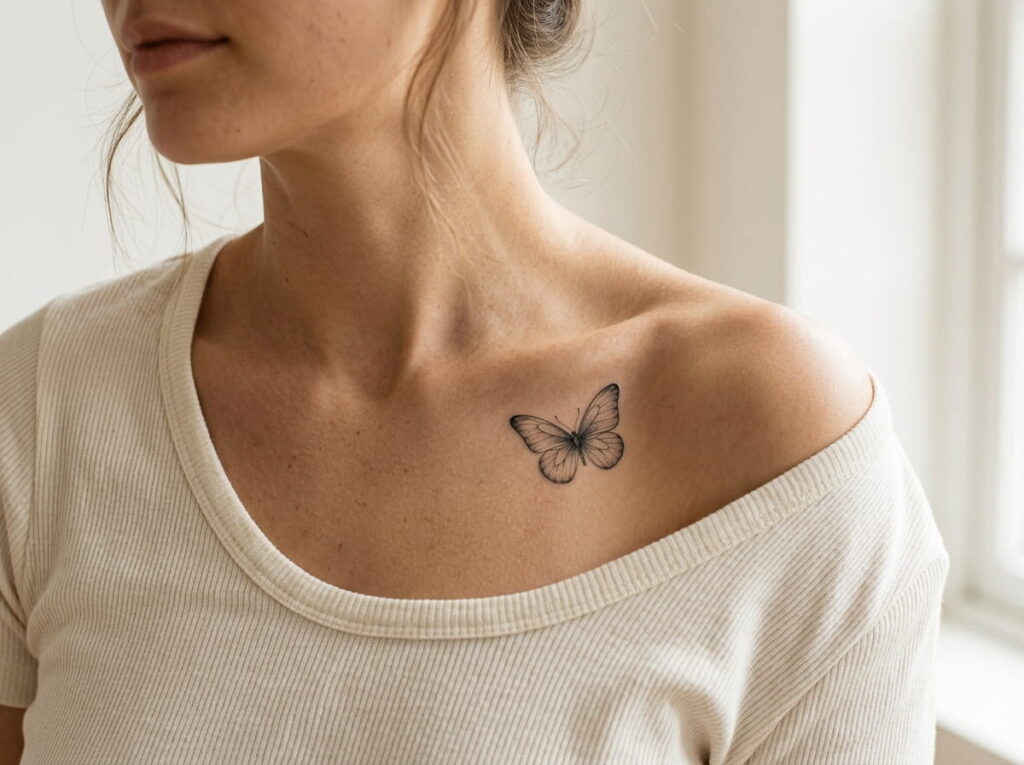
The collarbone is a straight ridge that rises slightly toward the shoulder, and that is exactly why it works. Lay the wings along it and the butterfly looks like it is lifting off a shelf.
Angle the body so the lower wing sits just under the bone and the upper wing rises above it. Point the head toward the shoulder for an outward launch, or toward the neck for a quieter feel.
Keep it small to medium. A wide piece fights the bone and can look warped when you raise your arm, so check the stencil while you lift and drop your shoulder.
Stage 3: Items 6 to 10
Rotation check: item 5 used an attribute strip, so these five go tip box, do and don’t panel, checklist, before and after, warning box. That makes 3 rich and 2 lighter in this batch, and 7 rich and 6 lighter across the plan. Palette is unchanged.
6. Let the Shoulder Blade Curve Carry a Butterfly That Seems to Glide
The shoulder blade is a gentle slope, and a butterfly set on it can look like it is coasting.
Run the body along the curve of the blade, with the upper wing leaning toward the spine and the lower wing following the edge of the muscle. Point the head out toward the shoulder tip for an easy sideways glide, or down toward the opposite hip for a slow swoop.
Test the angle with a friend and a phone. Photograph the stencil from behind while you roll your shoulders. Mirrors flip the direction and make it hard to judge where the head is really pointing.
💡 Quick Tip
Take one photo with your arms hanging and one with them raised. If the wings still look lifted in both, the angle will hold up in real life.
7. Place a Forearm Butterfly So It Flies Up Toward the Elbow, Not Across

Most people set a forearm butterfly sideways, wing tip to wing tip across the arm. It ends up looking like a bracelet.
The arm is a long shape, so let the butterfly follow it. Two directions work well:
- Head toward the elbow, for a climbing, upward flight
- Head toward the wrist, for a soft drop, like it is about to land
Inner and outer forearm tell different stories. The inner forearm shows when you reach or hold a cup. The outer forearm shows when your arm simply hangs at your side.
Run the body along the length of the arm.
Leave empty skin ahead of the head.
Lay the wings flat across the arm like a cuff.
Crowd the head against the elbow crease.
8. Let a Wrist Butterfly Trail Off the Edge of the Hand
Slide the stencil from the middle of your inner wrist toward the thumb side, and watch what happens. The butterfly stops sitting on you and starts slipping away from you.
Point the head toward the fingers and let the back wing tip land near the edge of the wrist. That small overhang is what sells the motion.
Small spots punish sloppy angles. A few millimeters off and the whole thing looks crooked, so check it several ways before the needle comes out.
Stencil checks for a wrist butterfly
9. Split the Wings Across the Ribs So the Body Bends Mid-Flap
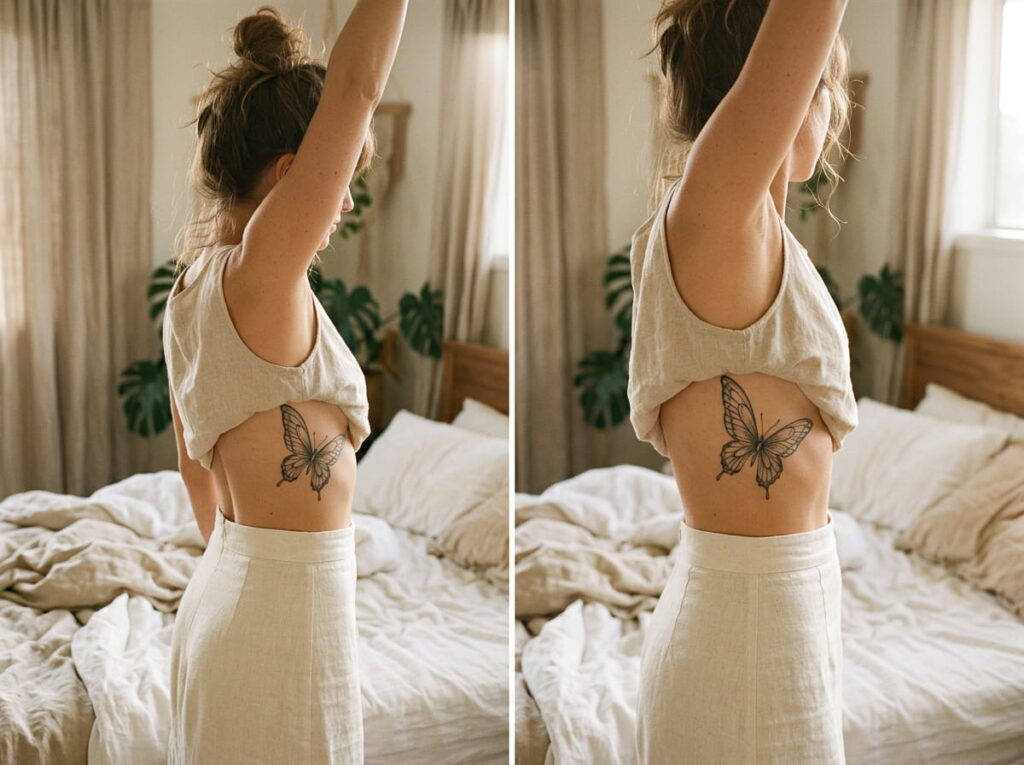
Ribs are never still. They move when you breathe, twist, and reach, and that movement is useful if you plan for it.
Place the body along the soft curve of your side, with one wing above the natural bend of your waist and one below. Make the wings slightly different sizes. Real butterflies rarely hold both wings at the same angle in flight.
Many people find ribs one of the more uncomfortable spots, so ask your artist about breaks.
Two matching wings, body dead center and straight. It looks stamped on, even though the design is pretty.
Body curved with the waistline, upper wing larger and lifted. Same butterfly, now caught mid-flap.
10. Turn the Ankle Butterfly Away From the Foot for Natural Motion
Here is a simple rule. On an ankle, the head should point up the leg or around the bone, never down toward the toes.
Pointing it up toward the calf makes the butterfly look like it is rising. Wrapping it around the outer ankle bone with the head facing back suits a quieter, side-glance look. Downward, the wings tend to droop, and it can look like the butterfly is falling.
Think about shoes too. Straps and socks sit right where the ankle butterfly lives.
⚠️ Watch Out
Shoe seams and sock bands can rub a fresh ankle tattoo. Ask your artist how long to avoid tight footwear and plan the appointment around what you wear most.
Stage 4: Items 11 to 13
Rotation check: item 10 used a warning box, so item 11 goes rich (quick glance grid), item 12 goes light (numbered steps), and item 13 goes rich (key takeaway banner). That brings the full plan to 7 rich and 6 lighter visuals, and no two in a row match. Palette is unchanged.
11. Add a Dotted Flight Trail Behind the Wings to Show the Path
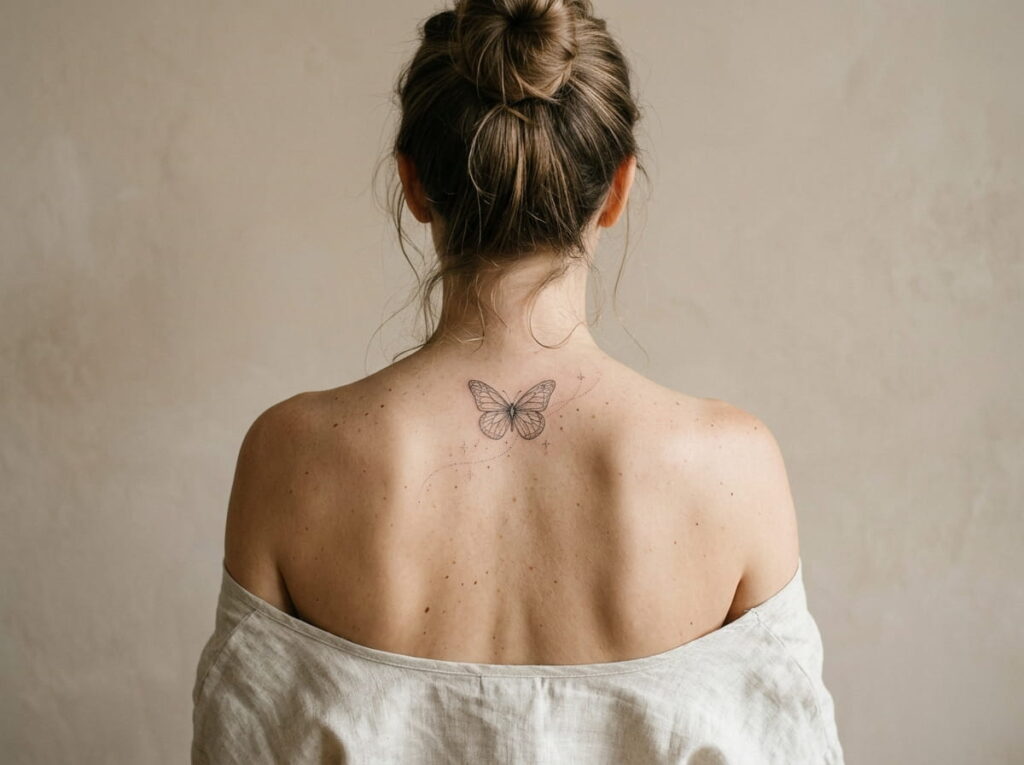
A faint trail turns a still butterfly into a moving one. The wings say where it is, and the trail says where it has been.
Start the trail at the back wing tip and run it opposite to the head direction. Keep it thin and let it fade out, because a heavy line looks like a leash. Dots, a small loop, and a soft wavy line all work, and each gives a slightly different mood.
One catch is that fine dots can blur as skin ages, so ask your artist how they hold up on your chosen spot.
12. Try the Stencil Walk Test Before You Commit to One Angle
Photos of a stencil lie a little. Skin moves, light changes, and an angle that looks right in one pose can look off the moment you walk across a room.
So give the stencil a real day. Many artists will let you wear it for a few minutes at the shop, and a quick test at home with a temporary transfer works too. Either way, the goal is to see the butterfly the way other people will.
Stand still in front of a mirror and note where the head points.
Walk a few steps, sit down, and reach for something on a shelf.
Ask a friend to snap photos from the side and from behind.
Pick the photo where the butterfly still looks like it is moving, then match that angle.
13. Make a Trio Fly the Same Way and Space Them Like a Real Group

A cluster looks like a swarm of stickers when each butterfly points a different direction. It looks like a flight when they share one heading.
Here is what makes a group read as motion:
- One shared direction, with small differences in tilt
- Three sizes, with the largest leading the way
- Gaps that widen toward the back, like a loose trail
- A gentle arc that follows the body, such as the shoulder, hip, or spine
Skip the tight grid. Evenly spaced butterflies look like wallpaper, and the uneven gaps are what make the eye travel.
Several butterflies read as flying only if they agree on a direction. Vary the size and tilt, but keep every head pointed the same way.
Conclusion
A butterfly looks like it is flying when everything around it agrees on a direction. The head points somewhere, the wings tilt off vertical, and the body follows a line your own shape already makes. That is the real reason good butterfly tattoo placement works, whether the butterfly sits on a wrist or a rib cage.
Before your next consult, decide where it is headed, test the stencil while you move, and leave a little empty skin ahead of the head. Your artist can handle the rest, and you will walk in knowing exactly what to ask for.
Bring this to your consult







Leave a Reply